Author: Kevin
A short drive through the Cavalier Wildlife Management Area
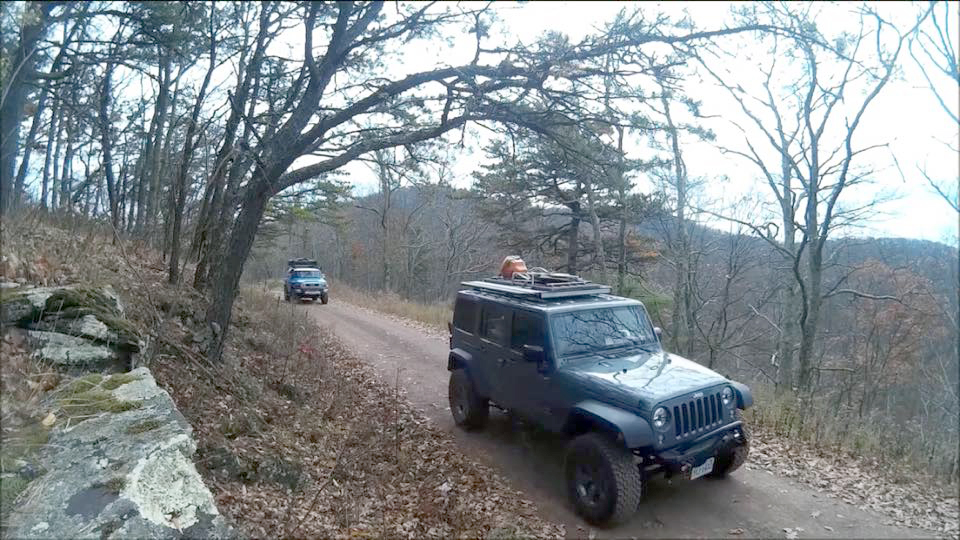
Sitting just east of the Great Dismal Swamp along the VA/NC border, the Cavalier Wildlife Management Area in Chesapeake, VA is the closest location I’ve found for primitive or dispersed camping. A recent visit revealed a farm-like area with roughly 6 miles of gravel roads, plenty of wildlife, and virtually no other visitors. I’ve made a contact with DGIF who is responsible for the area and I plan to gather some additional information from him before venturing out again. I’m looking forward to returning in the fall once the vegetation thins out some, allowing for easier exploration.
How to install a Trasharoo
I’ve read about a lot of people struggling to install a Trasharoo and I wanted to demonstrate just how easy it can be. I’ve used this configuration for three years. Every trip starts off with a full load of dry firewood for the first night and ends with a big bag of trash from what I discard, as well as what I pick up along the trail. Tread lightly.
DJI Osmo Mobile 2
Out with the oil and in with the new
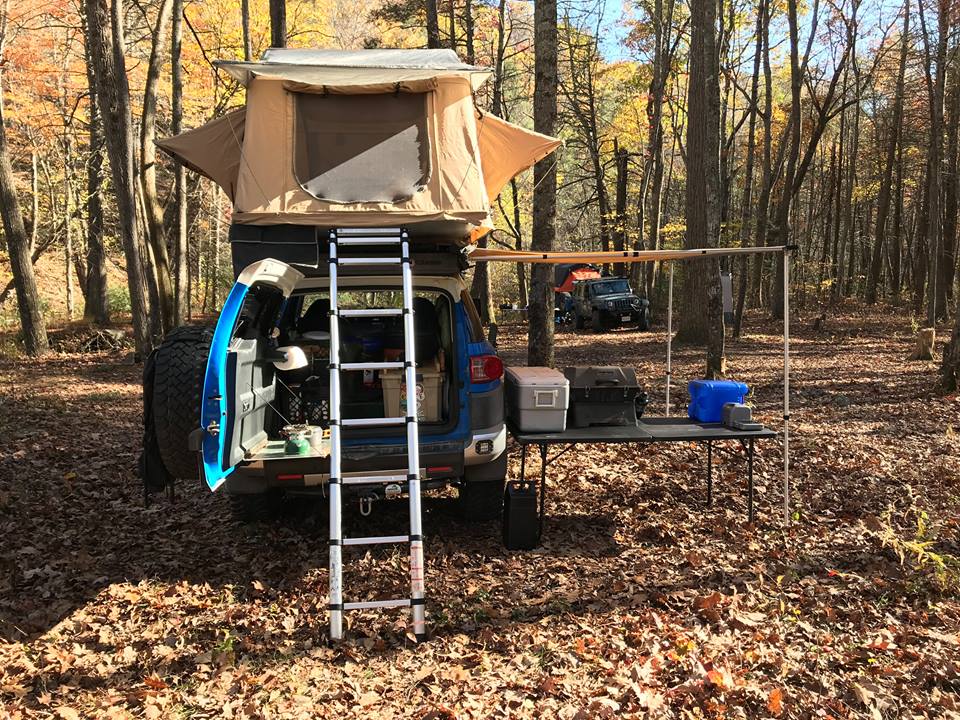
Let’s Table This Discussion
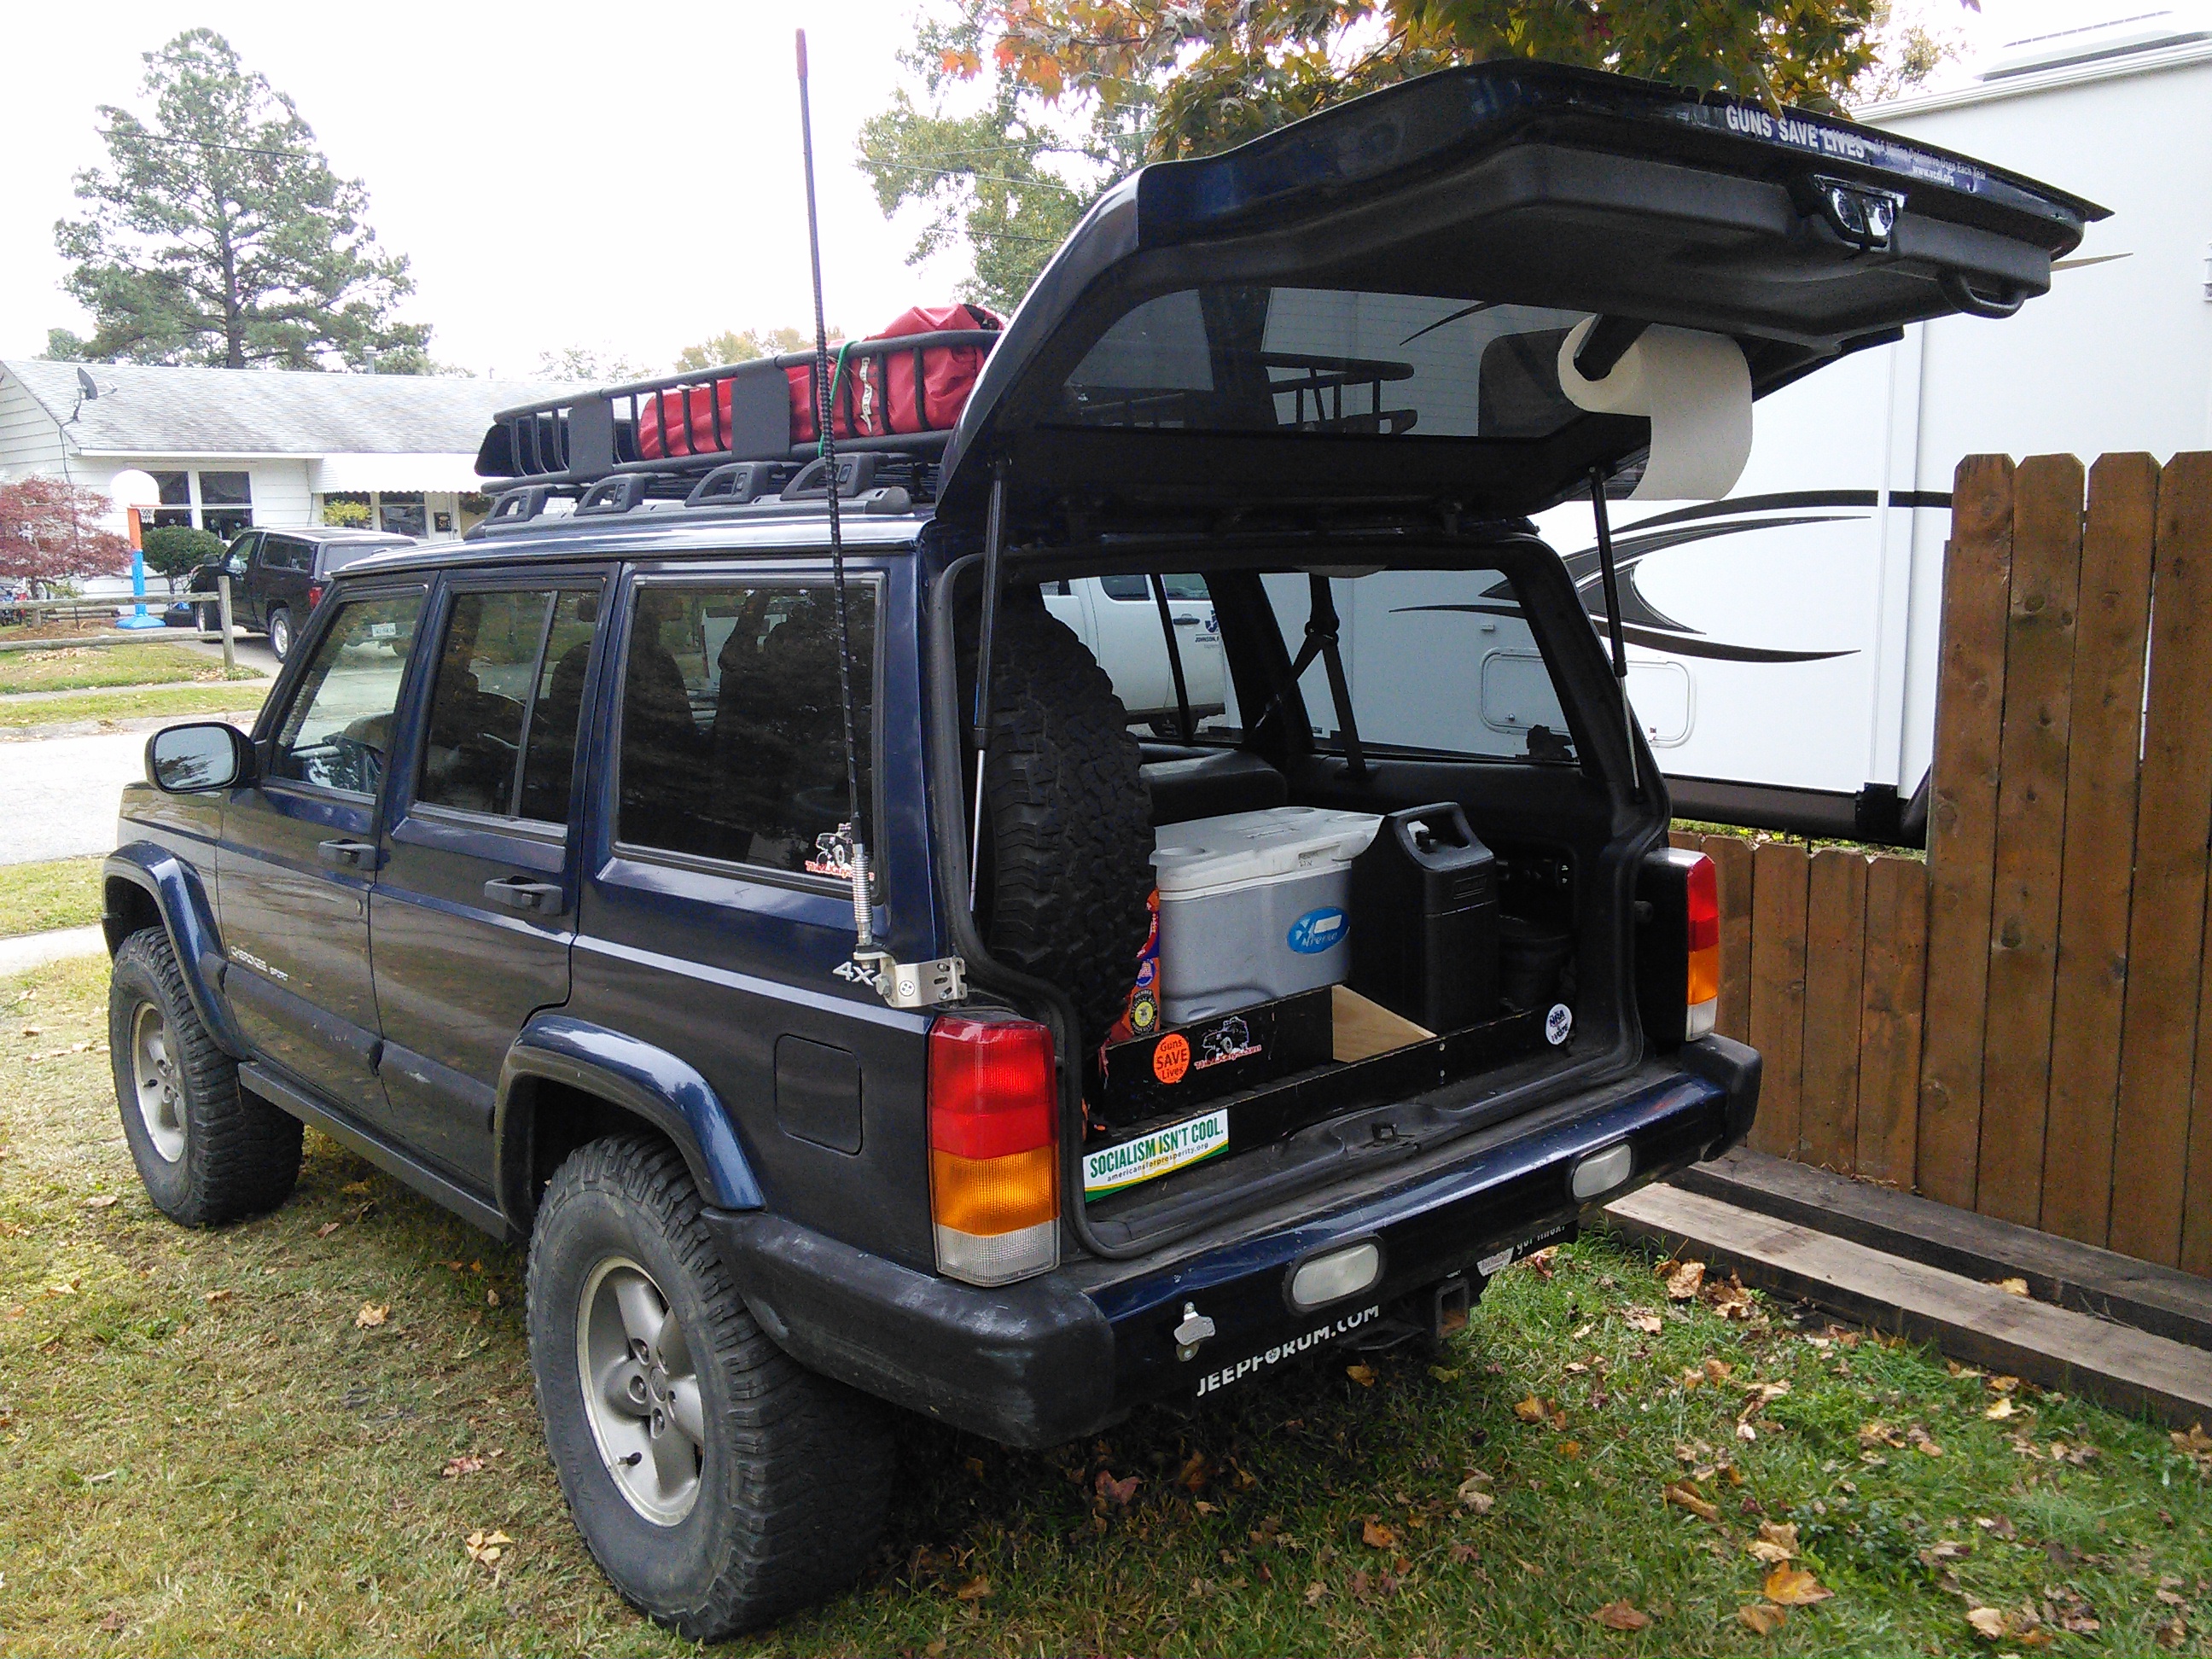
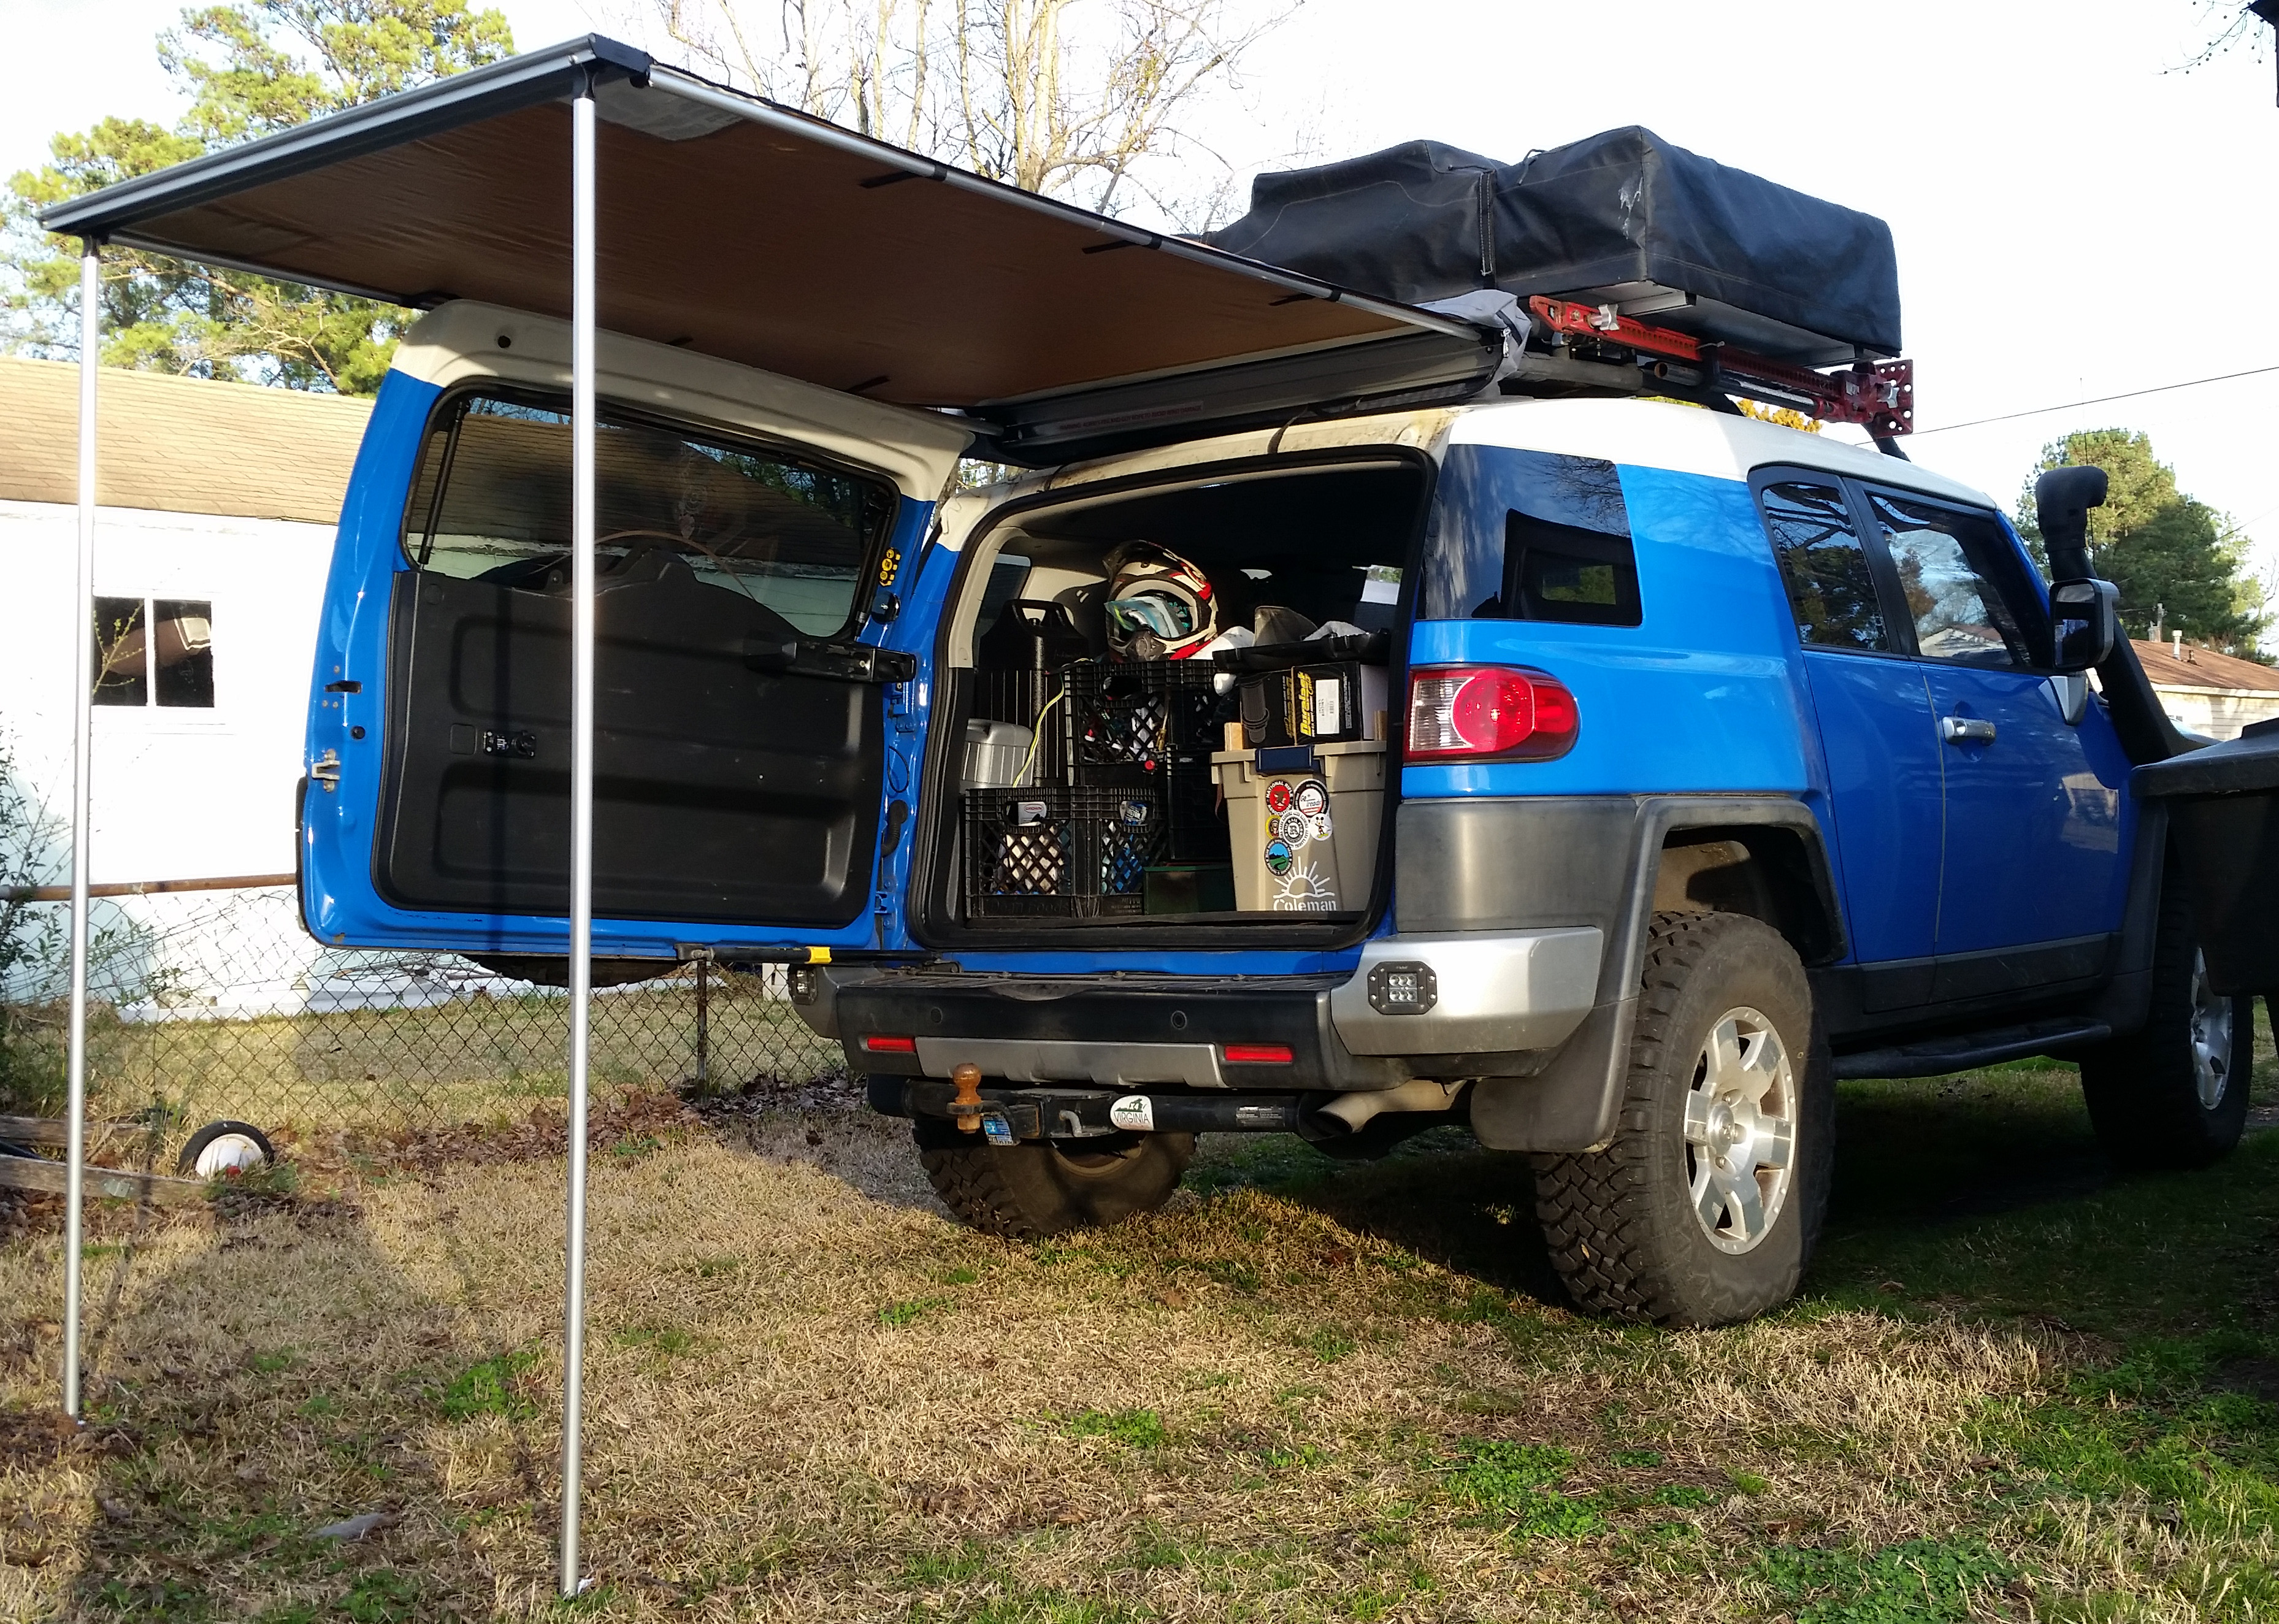
I’ve now learned I prefer vehicles with rear hatches, but there are certainly benefits to having a rig with a rear door. Having the spare mounted to it from the factory is the most obvious plus, but it also allows for a table to be installed.
I was largely unimpressed with what I was finding that was FJ-specific. The rear cargo area is already tight, and I didn’t like the idea of mounting anything thick to the door that would further limit cargo space. That pushed me to craft something on my own.
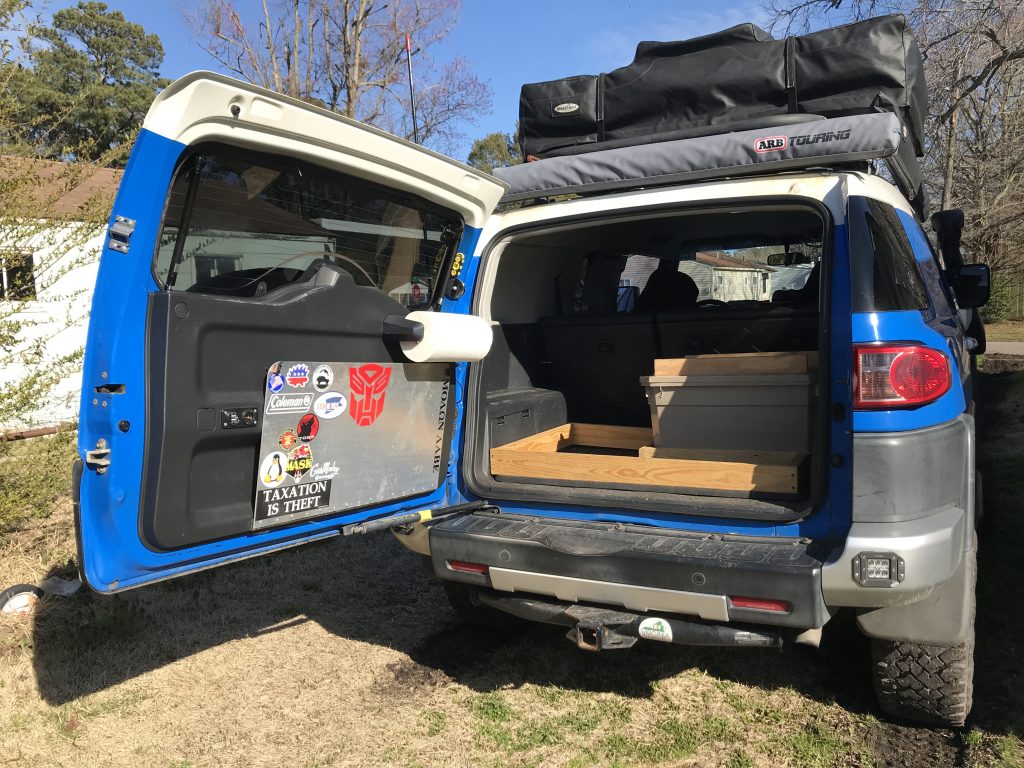
I never planned on splitting wood or driving u-joints out of driveshafts with this table. It’s just for making a cup of coffee or doing some simple cooking during a quick stop. This lightweight design has led me to call it a sandwich table.
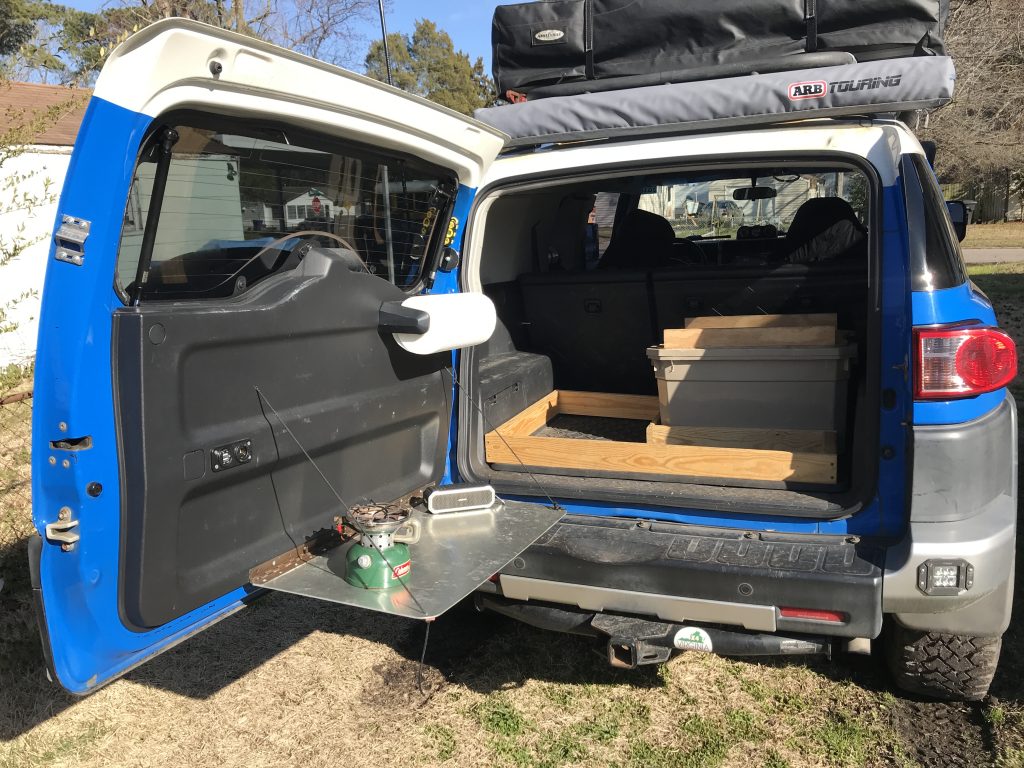
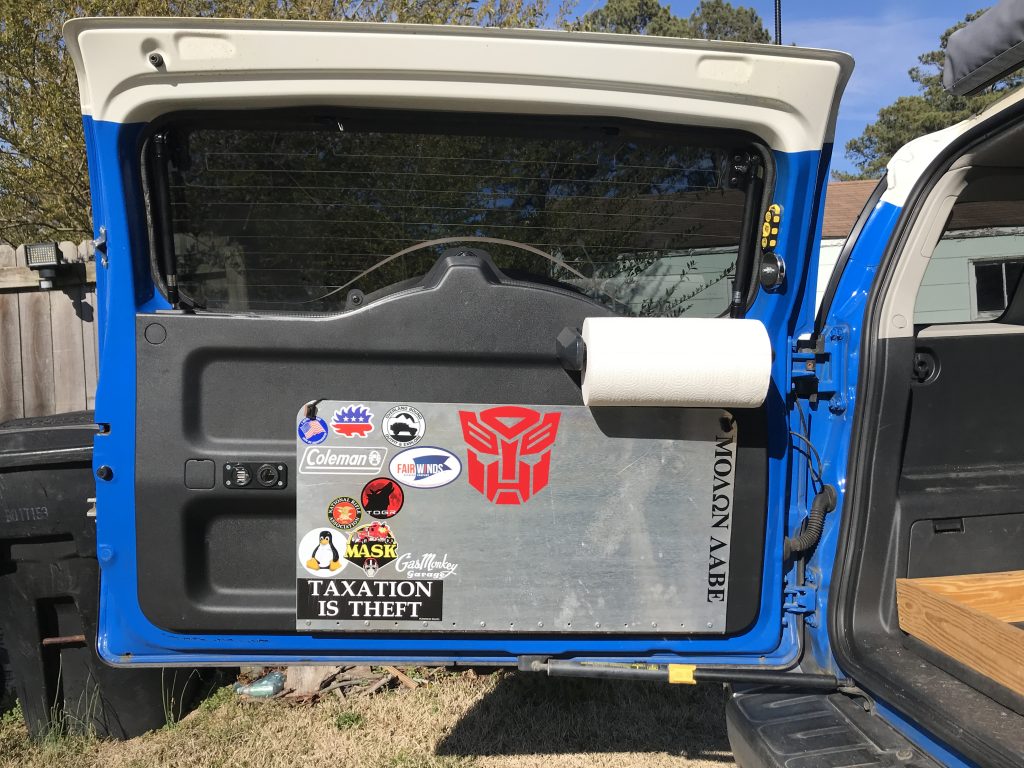
Construction was pretty straightforward. I started with a small piece of 1/8″ aluminum I had laying around. I sized it to clear my paper towels and charging ports.
This had the advantage of also allowing it to clear the ladder for the rooftop tent.
The aluminum swings on a continuous hinge. I was originally going to buy a new hinge, but my dad had an ancient brass section laying around. It was really cool to me to be able to use something he’d just happened to have been hanging on to all these years. The hinge is riveted to the aluminum and secured to the interior panel with coarse-thread wood screws.

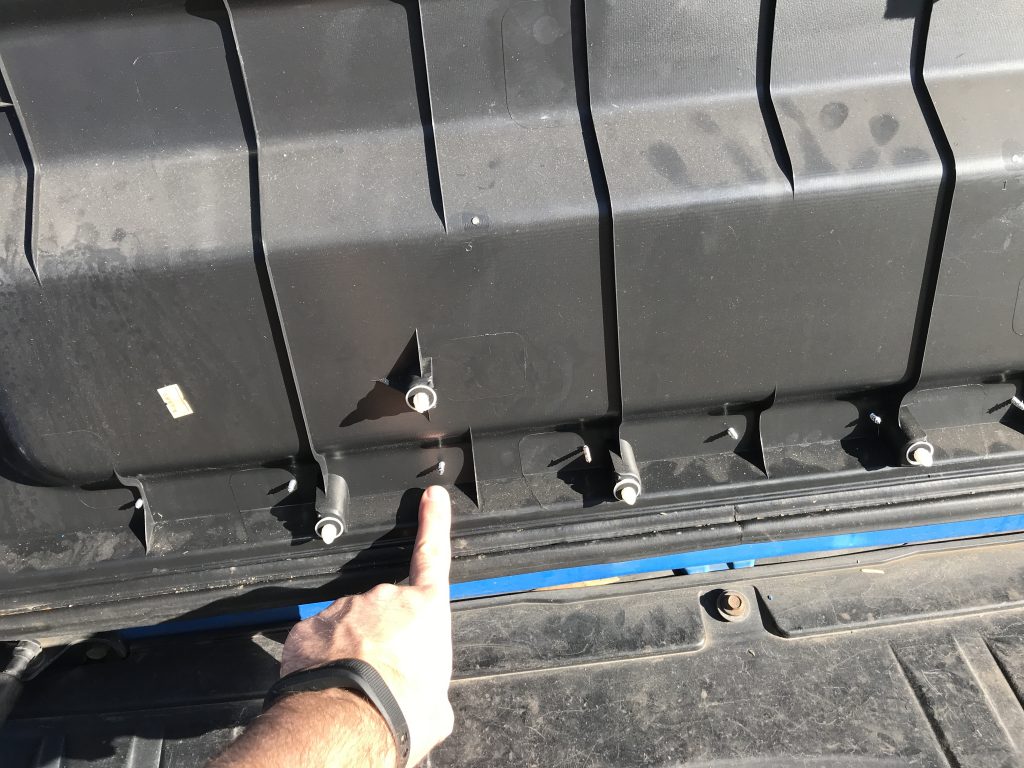
To support the table, I punched holes in the outer corners and used some 550 cord running from the door panel out to the table at about 45°. The right side is tied off at a set length to allow the table to fold down 90°. The left side remains adjustable so that the table can be secured when in the up position. Adjustments are made with cord locks. I happened to have a set that came with a pair of Keen shoes. They were terrible at keeping my laces tight, but they’ve worked great for this table. Comparable locks are available in a variety of colors for less than $1 each.
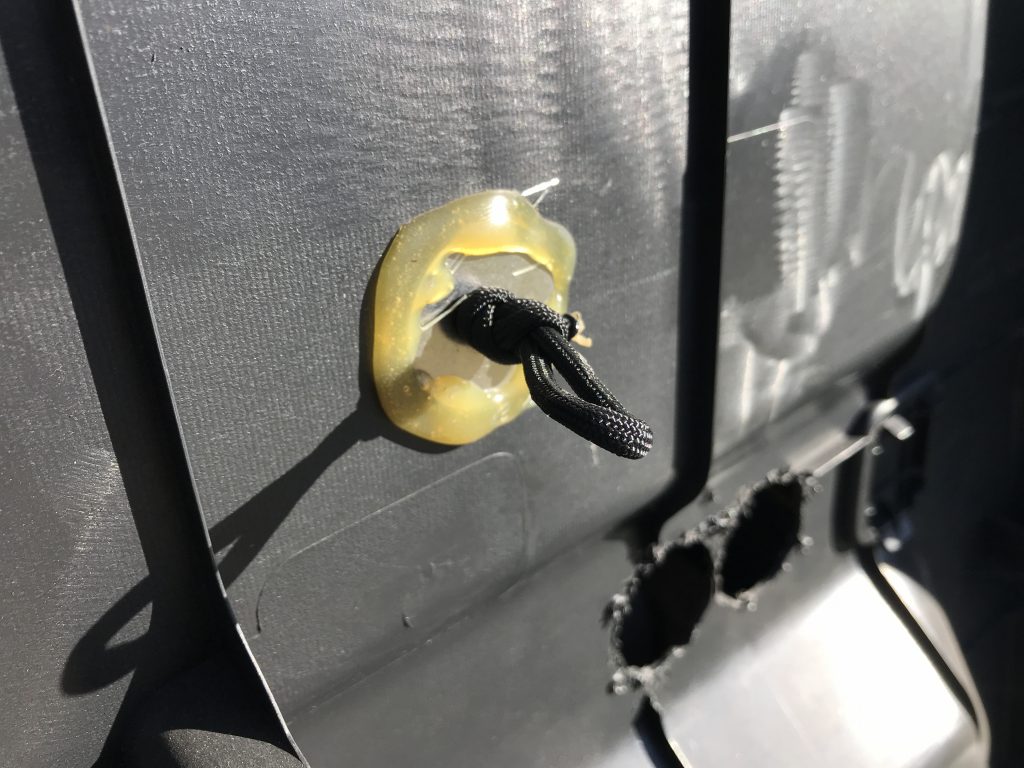
Behind the interior panel, the 550 cord is run through a fender washer and knotted up securely (by my buddy, Jay). The washers are glued to the interior panel to keep the rattles down.
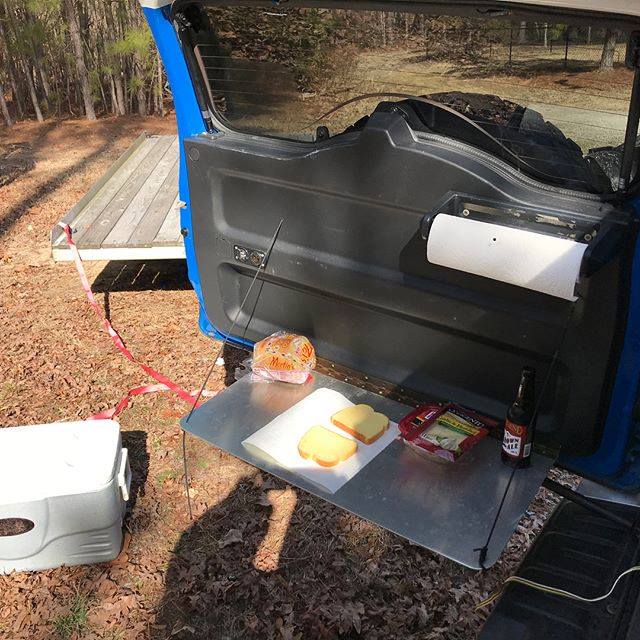
It’s not the prettiest or the most durable option, but for throwing together a PBJ or slicing up some limes for our Pacifico, it has been exactly what we needed!
Orange you glad we checked out another awning?
Following up on our previous comparison of awnings from Smittybilt and ARB, last weekend we were able to check out an offering from Tepui on a friend’s JKU.
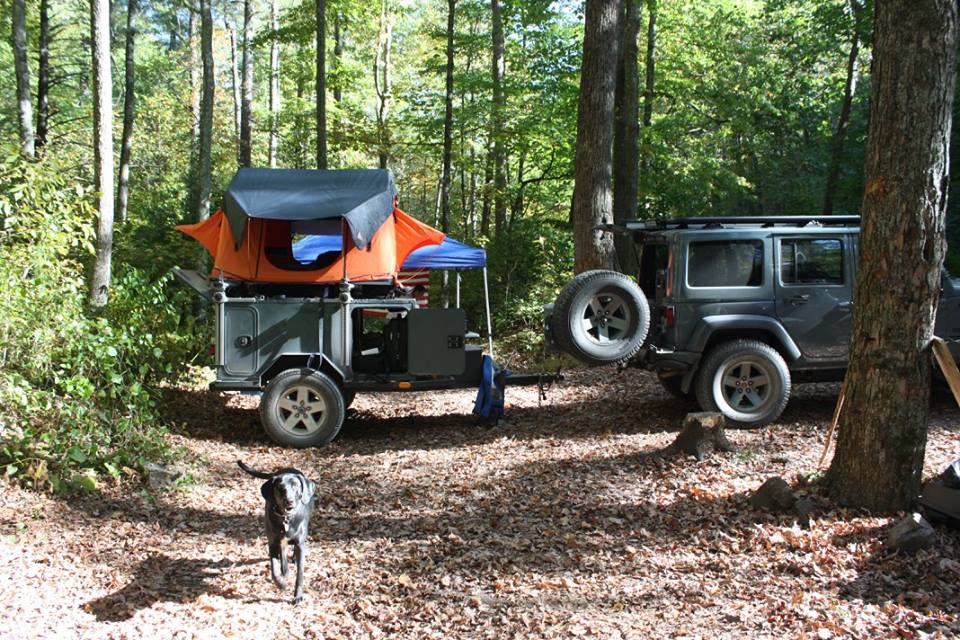
Neil first purchased a tent from Tepui and fell in love with the orange. The tent was first mounted to the JK roofrack before Neil made his incredible offroad trailer. In the near future, we’ll try to put together a walk-around video where he can tell you more about his builds.
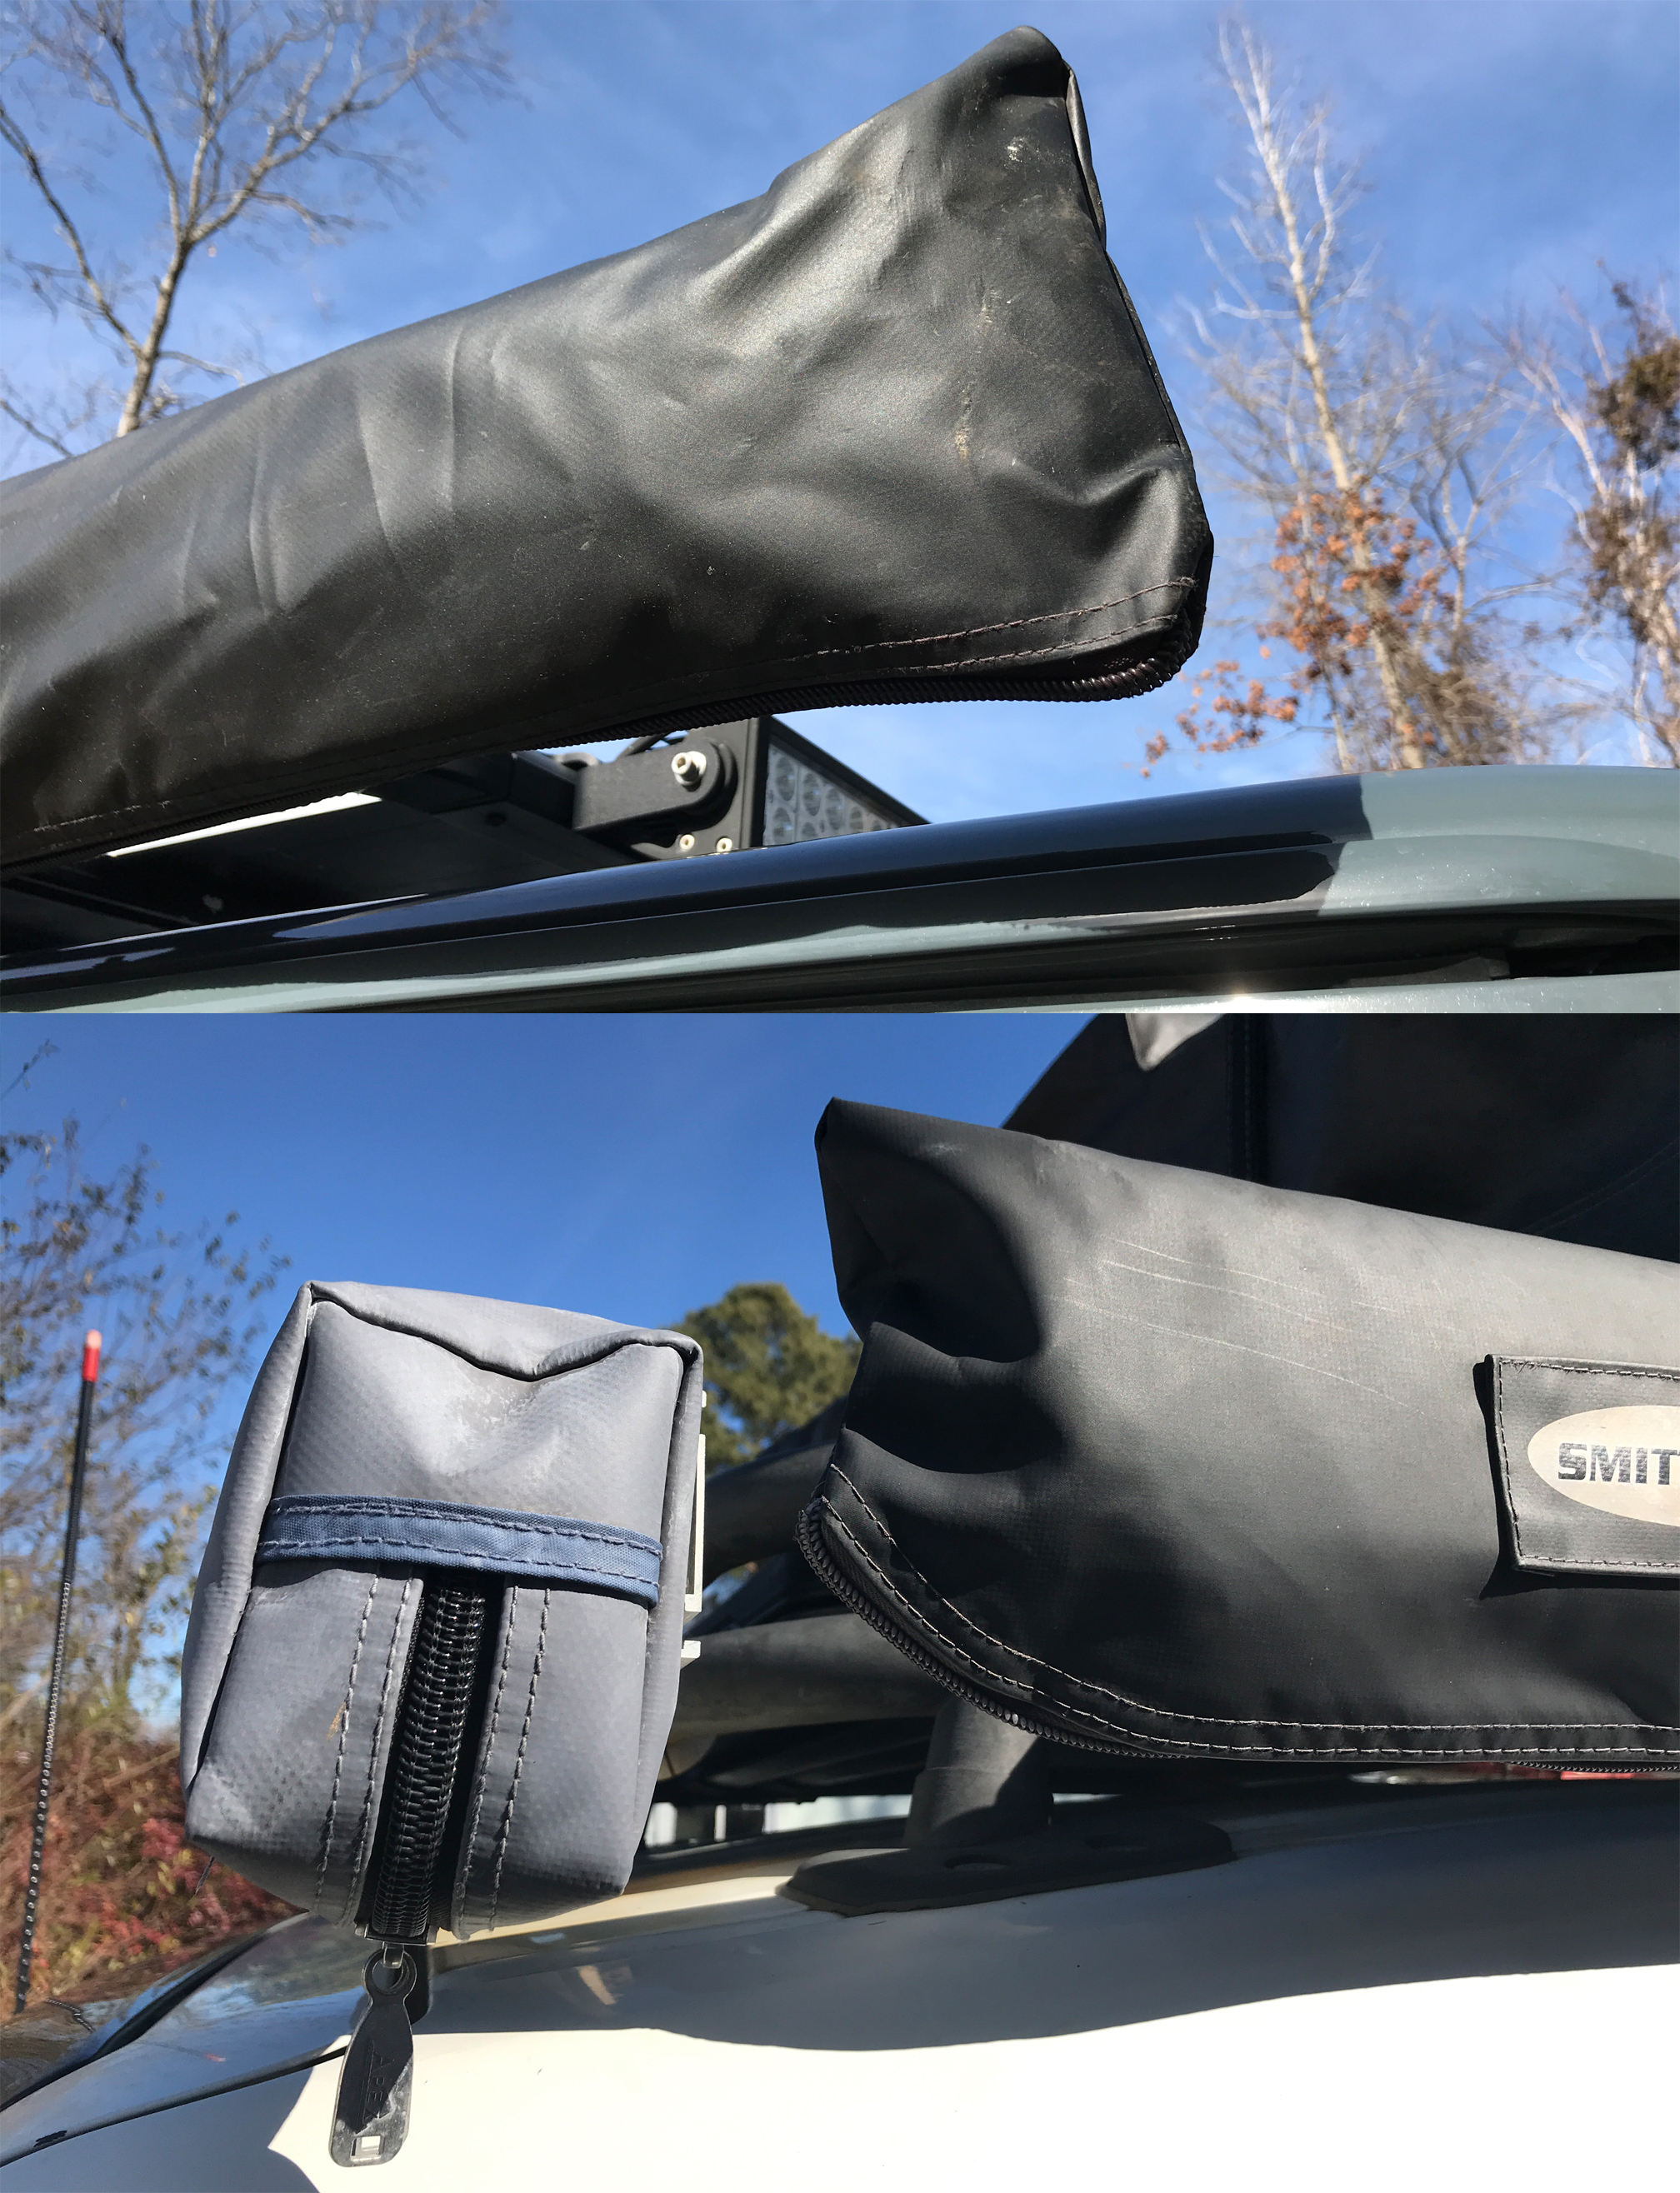
After buying the tent, he became interested in adding some shade. At the time he was shopping for an awning, orange was not one of the colors being offered on the website, so he gave Tepui a call to see if an orange awning was a possibility. He got some great news! Not only could they craft awnings in a variety of colors, they could also make them in different sizes as well. Tepui’s website only lists 4-foot and 6-foot sizes, but Neil wound up with an 8′ x 8′ that is color-matched to his tent.
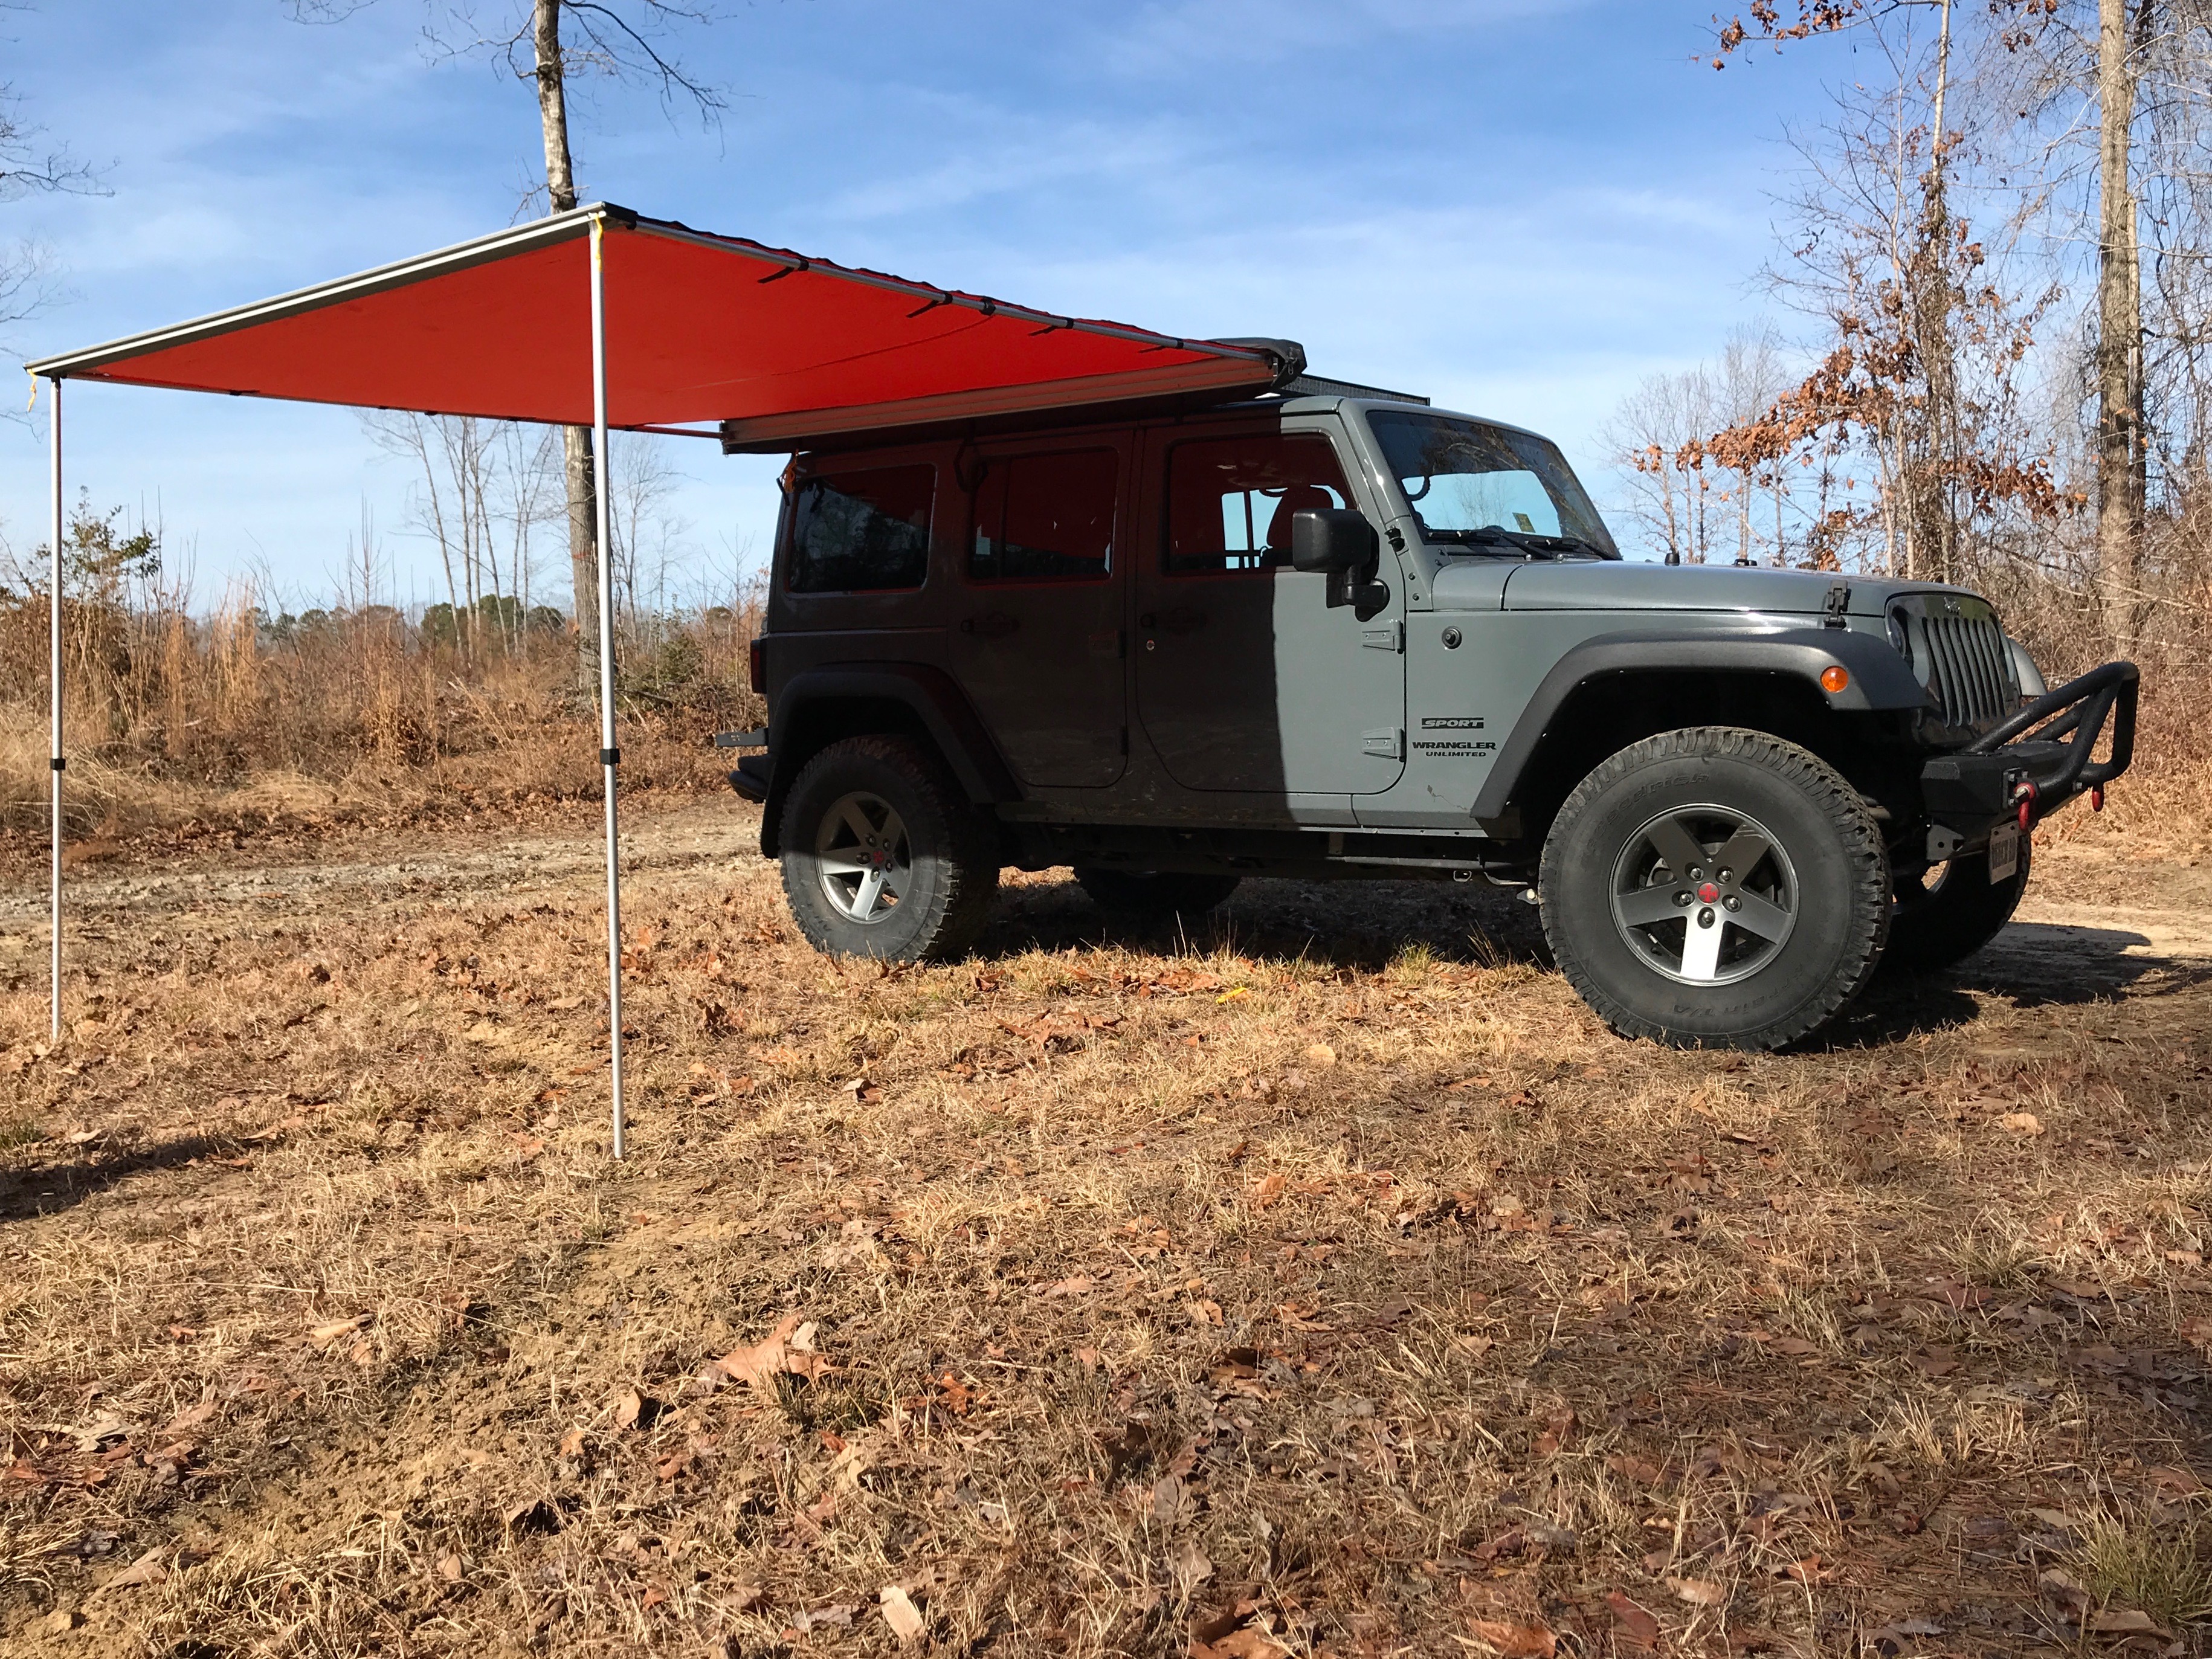
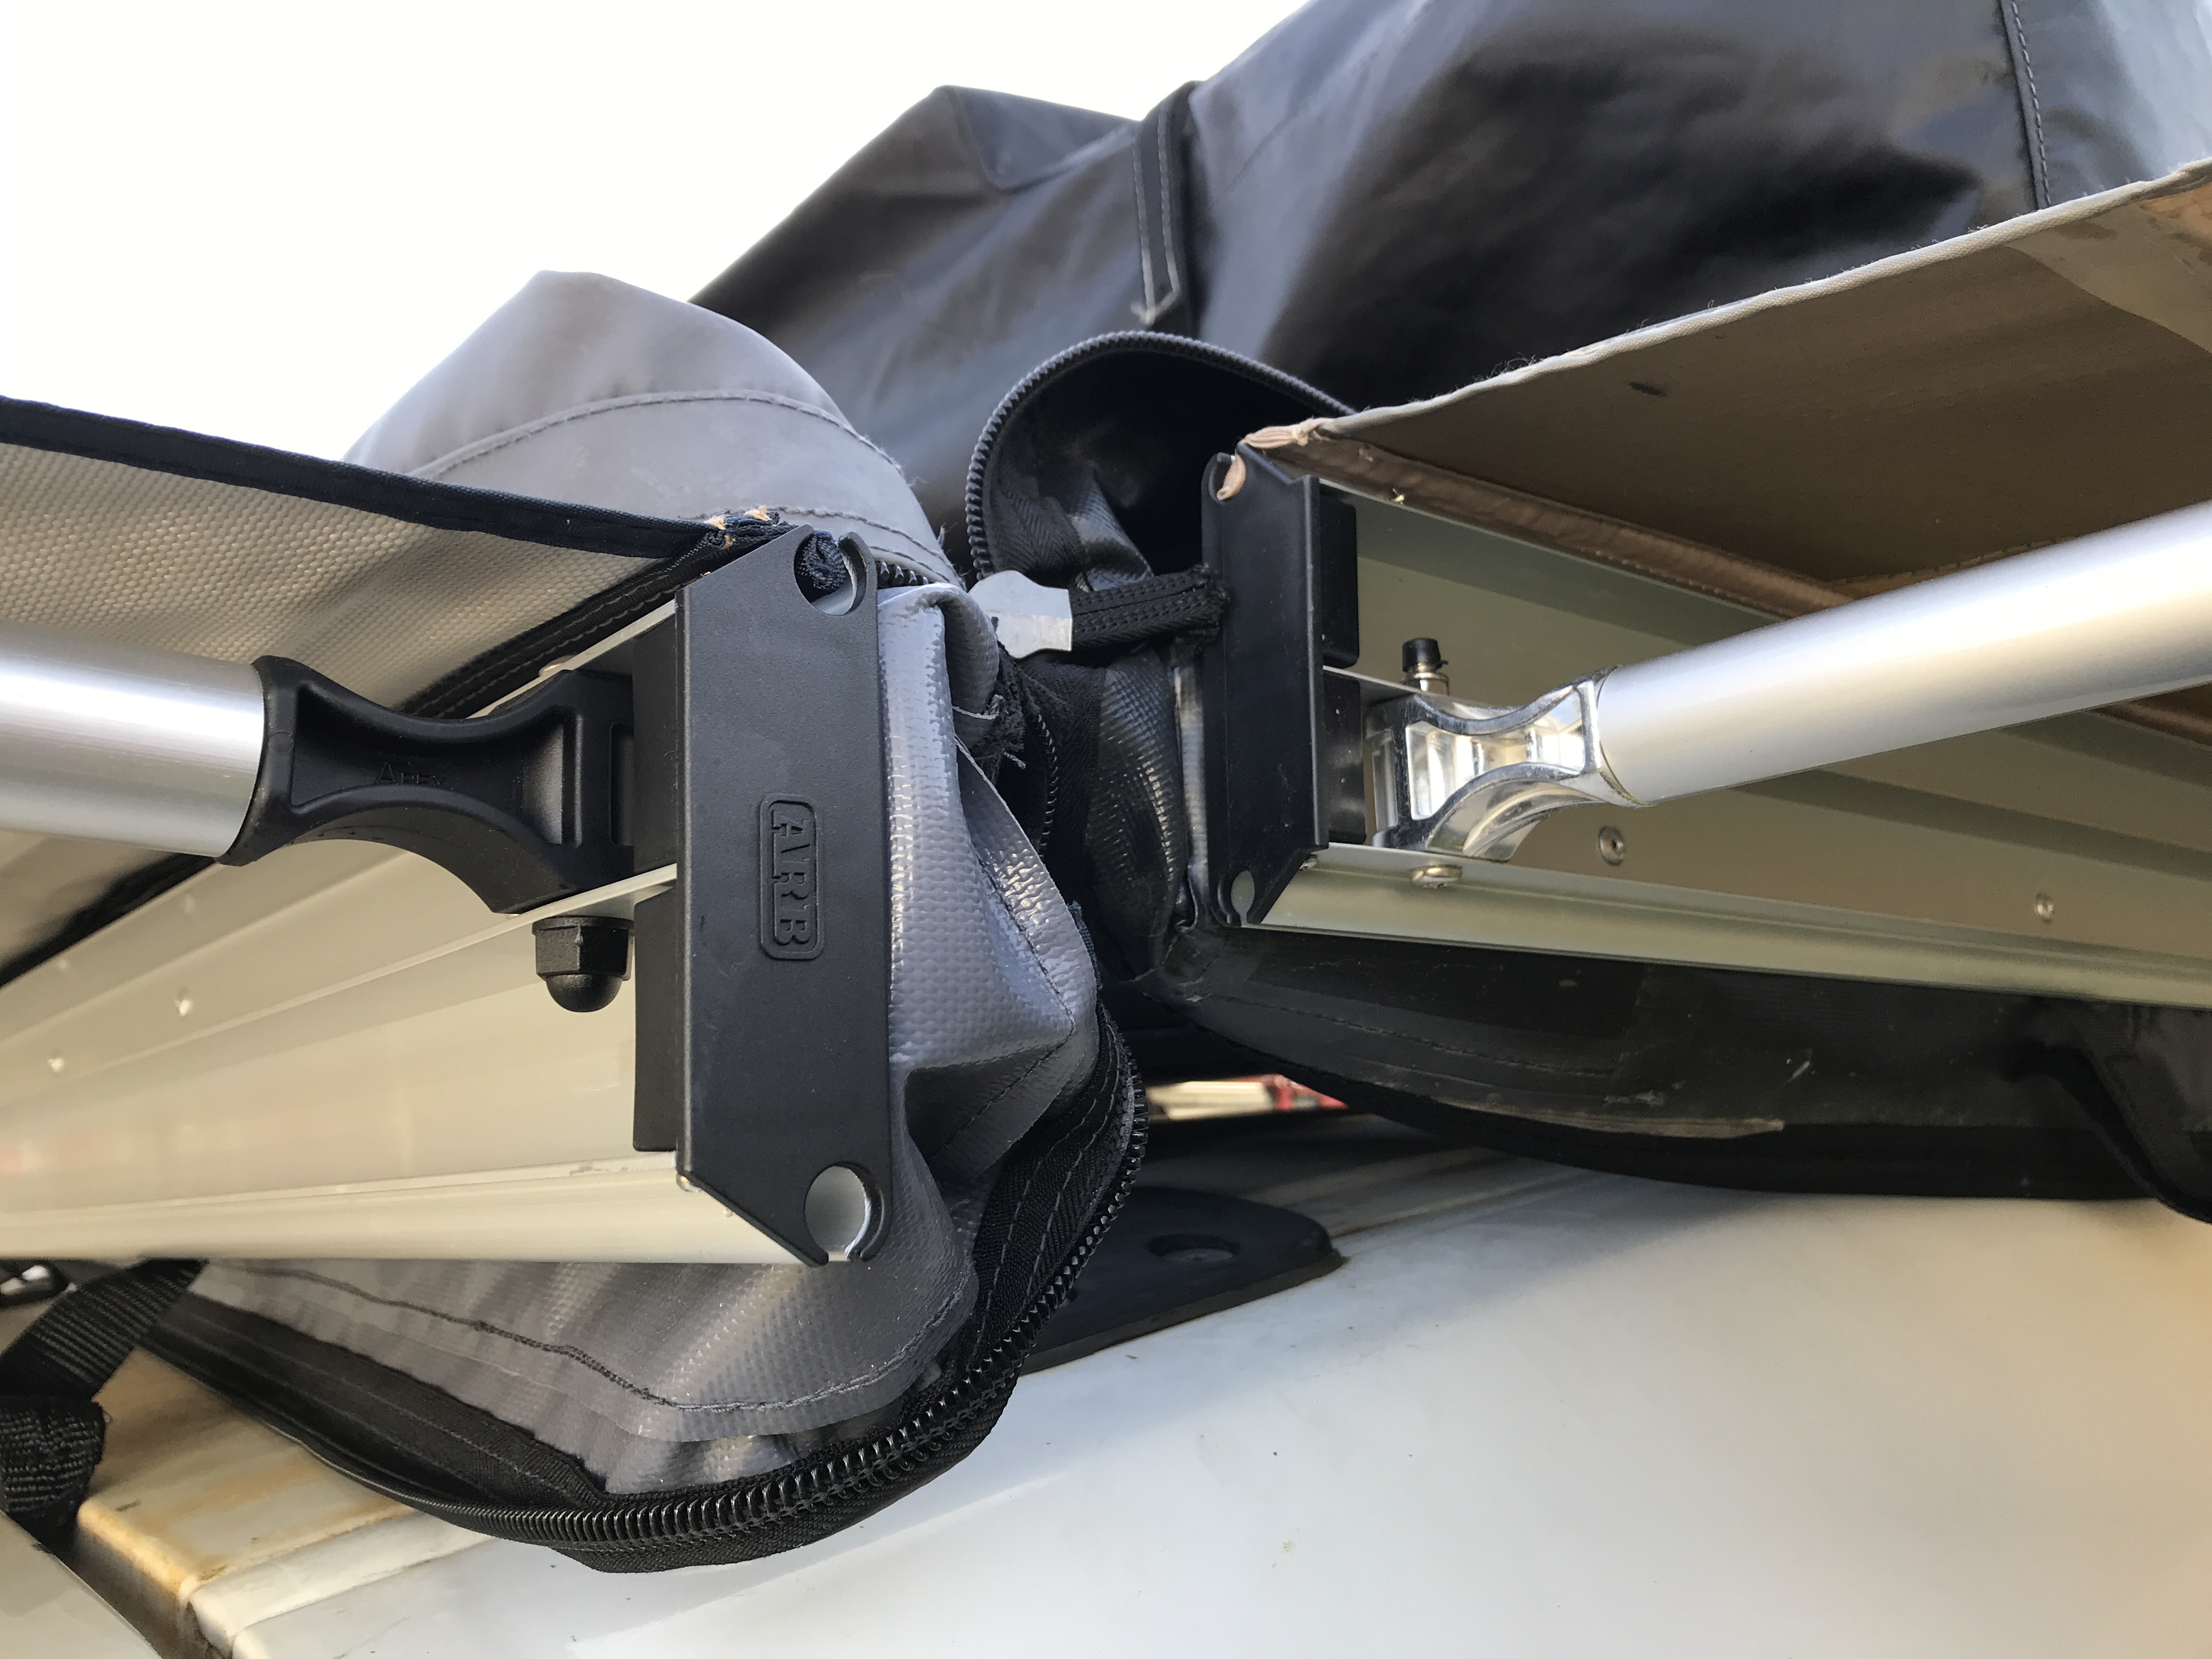
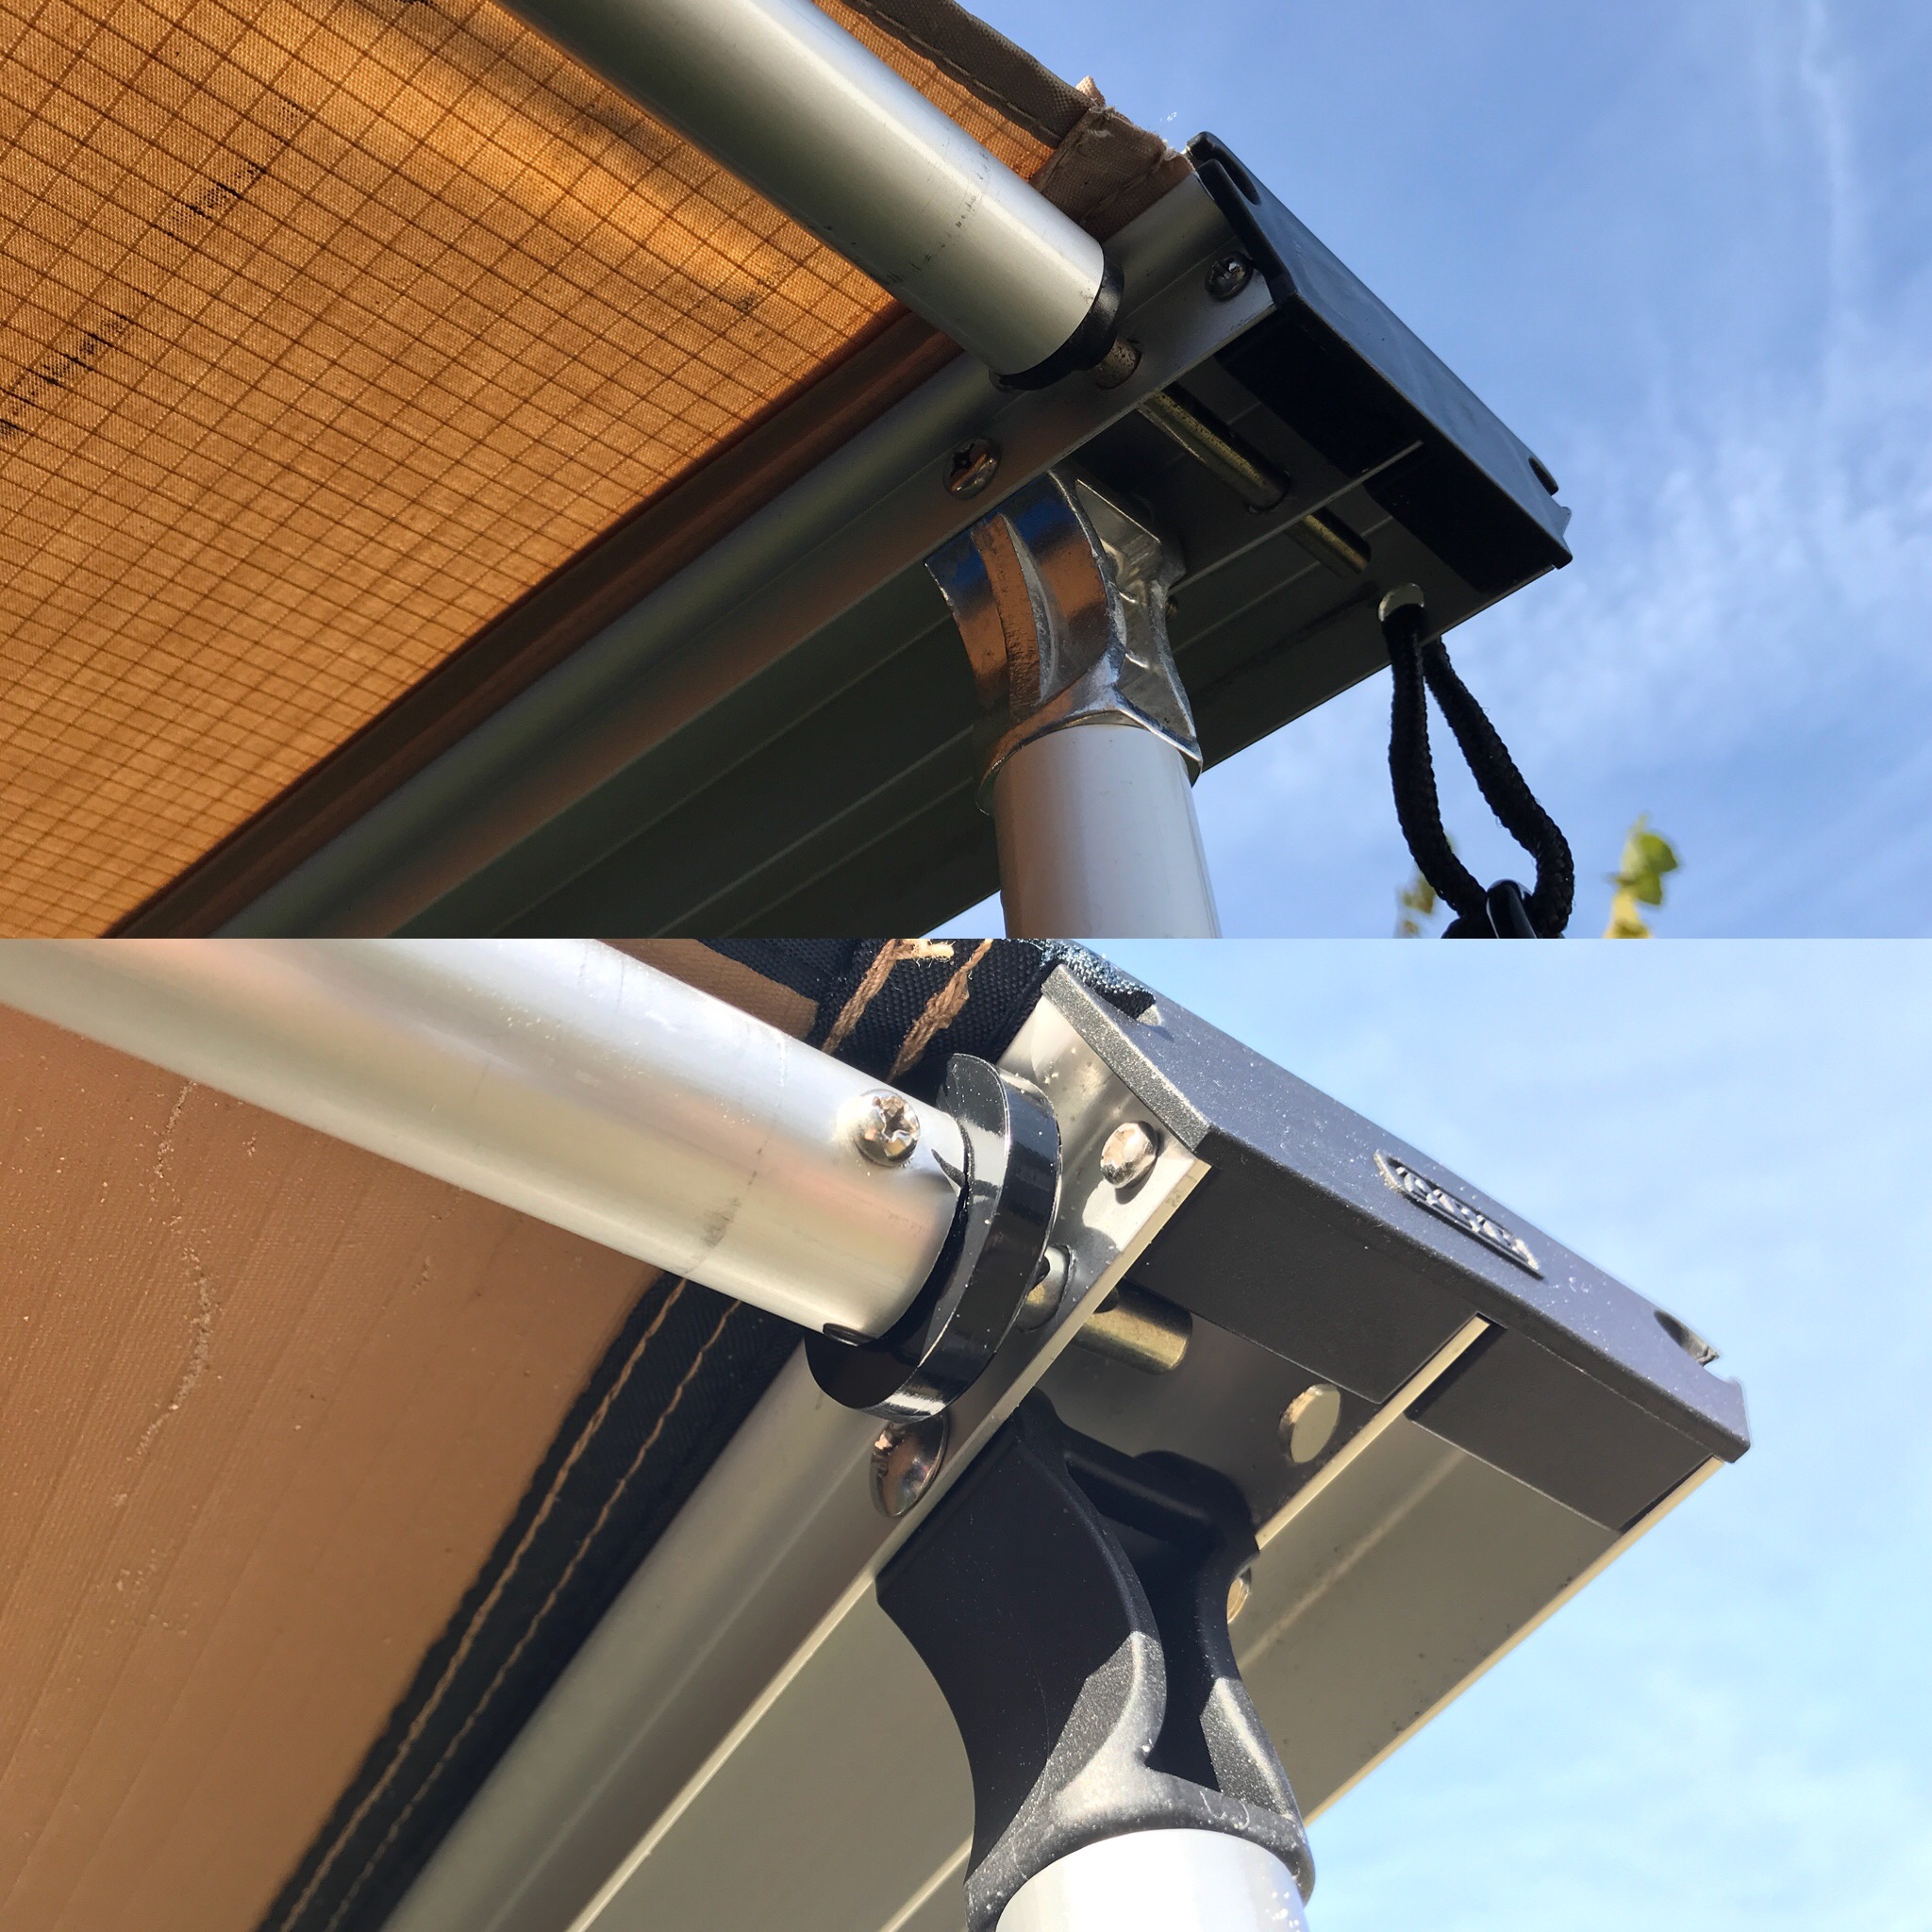
The joints on the Tepui and Smittybilt look identical. Both are metal and feature reinforcement ribs in the same areas. The aluminum channels on the Smitty and Tepui appear identical as well. Tepui includes a much-appreciated finishing touch by placing large plastic acorn covers over every nut. Tepui has also added reinforcement material at all 4 corners. We think this will substantially increase durability. If the fabric was ever going to tear, it would start at a corner. Doubling-up the material there is thoughtful engineering.
The Tepui pole pins aren’t as long as the Smittybilt, but are still of a different design than the ARB.

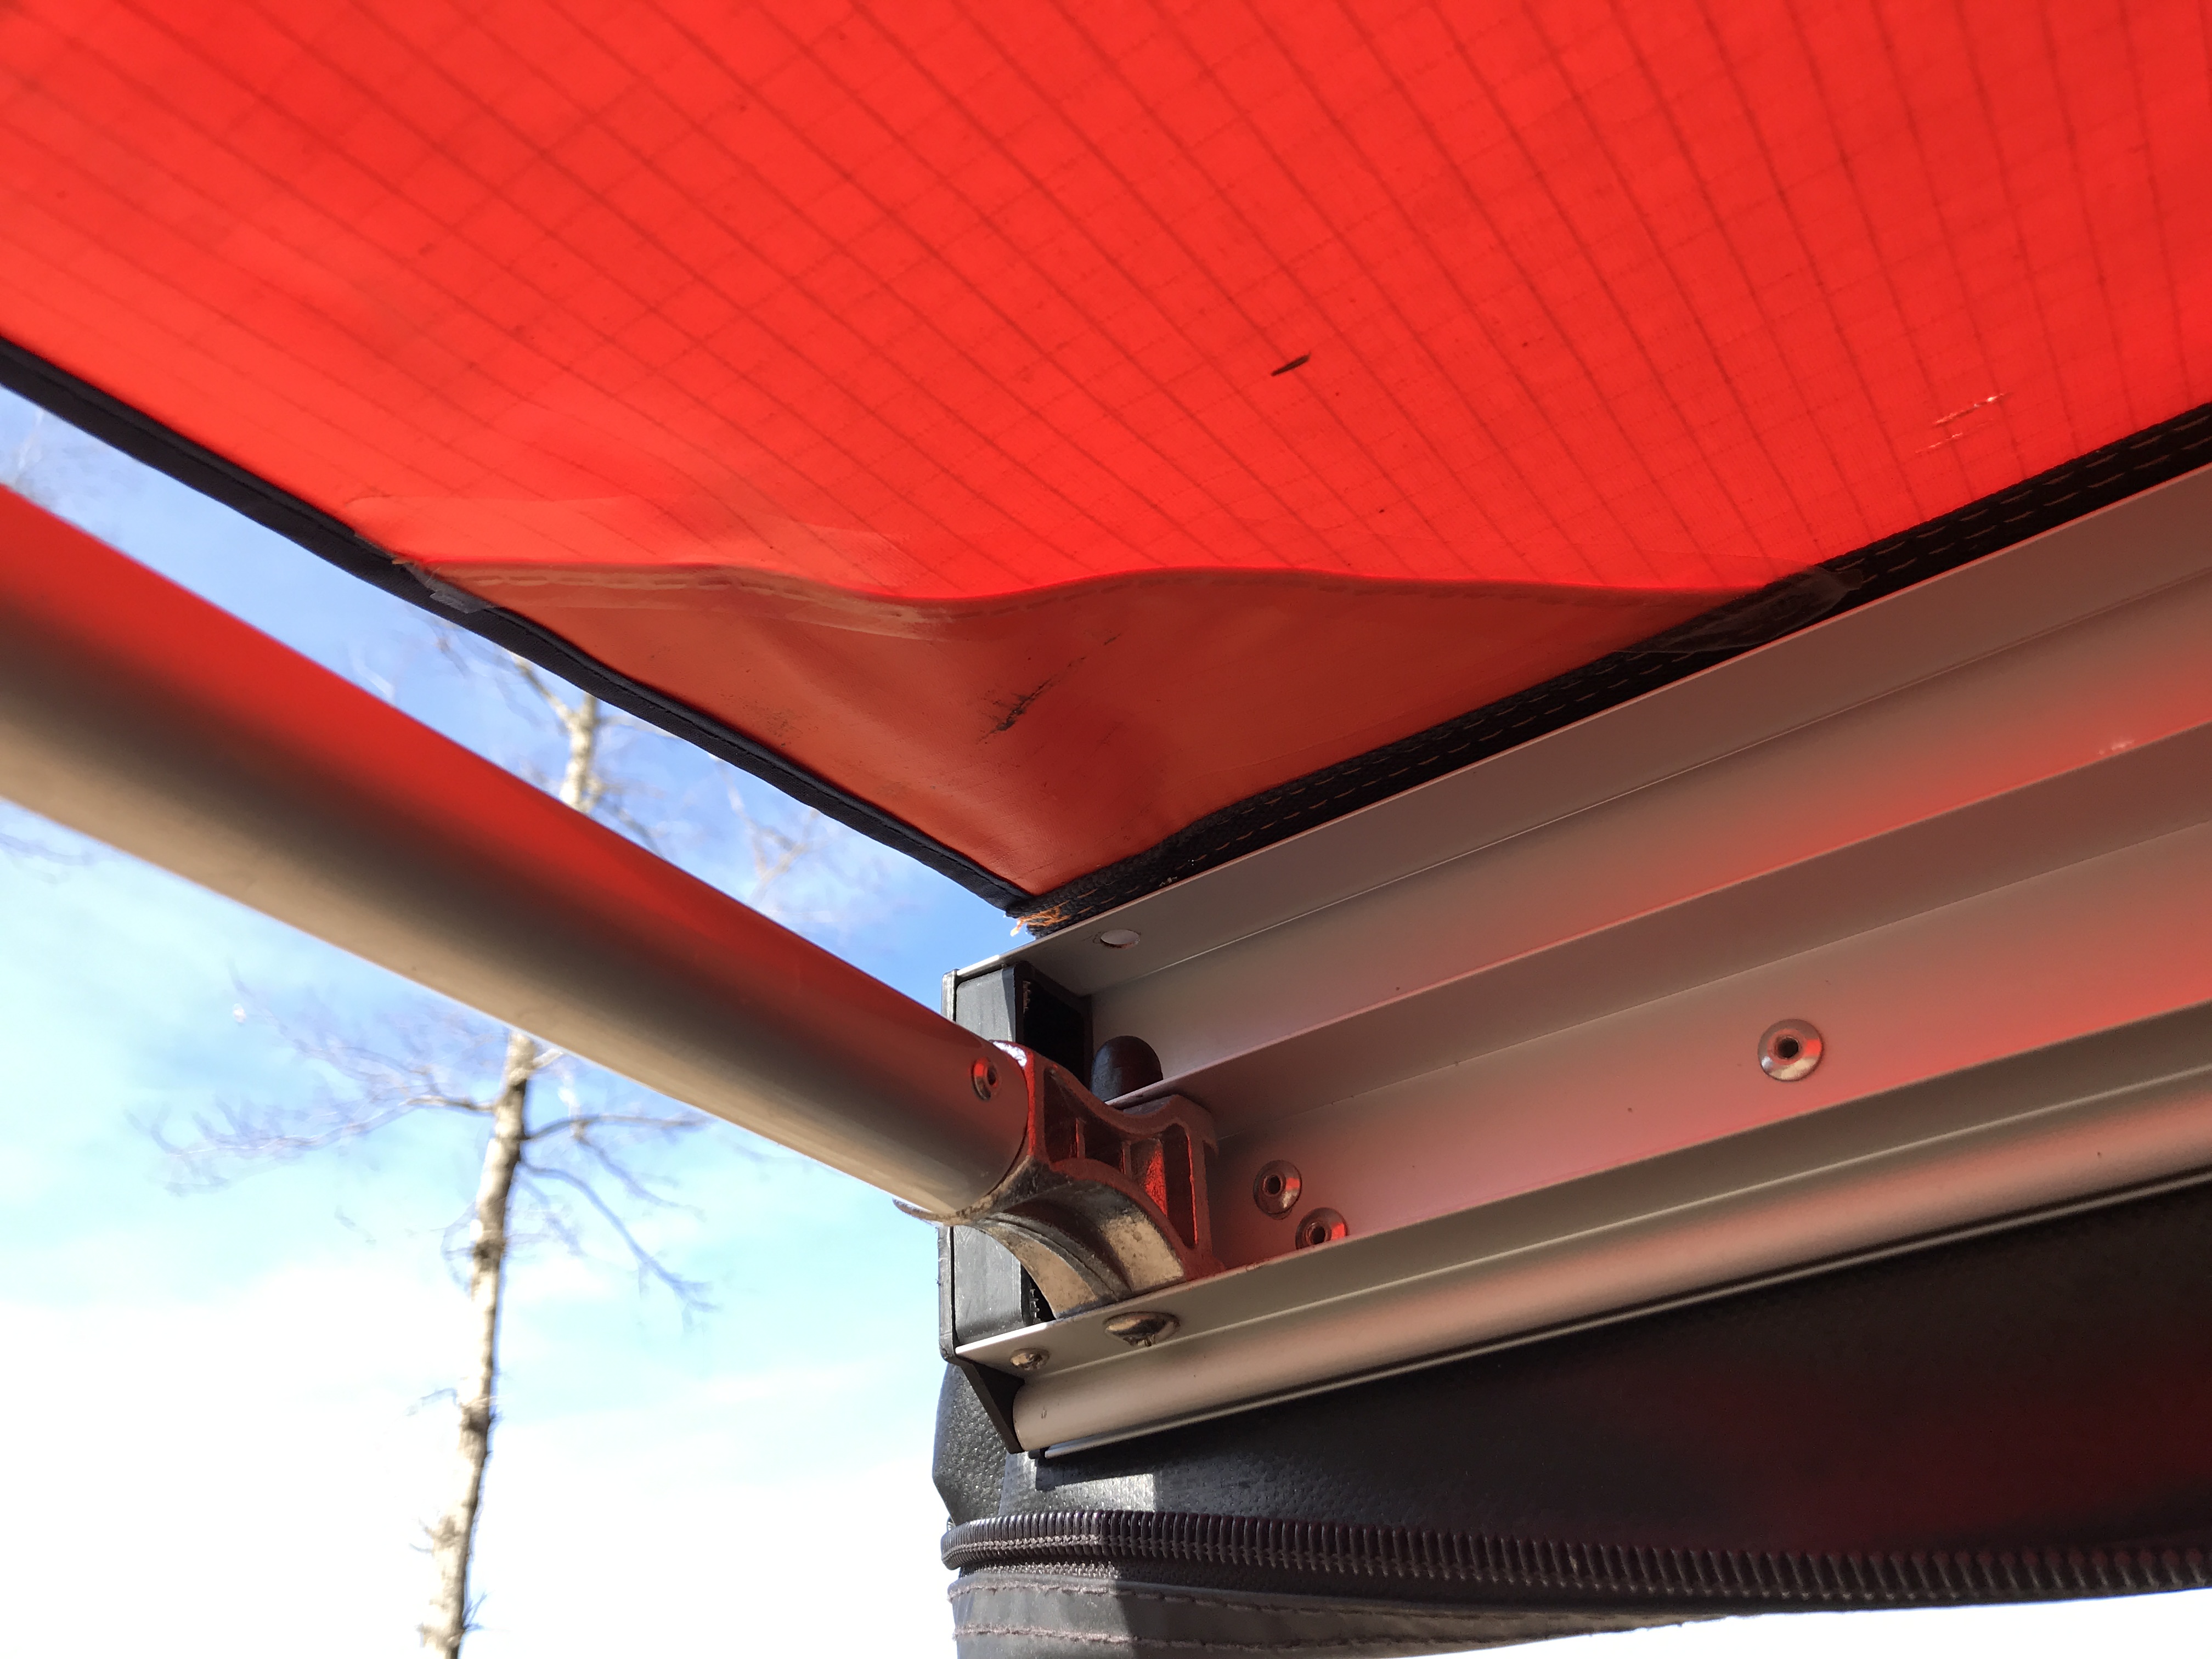
Tepui has designed their covers differently than both Smittybilt and ARB. The seams are not taped, but they are overlapped and double-stitched. No daylight shown through and the superior quality was very apparent.
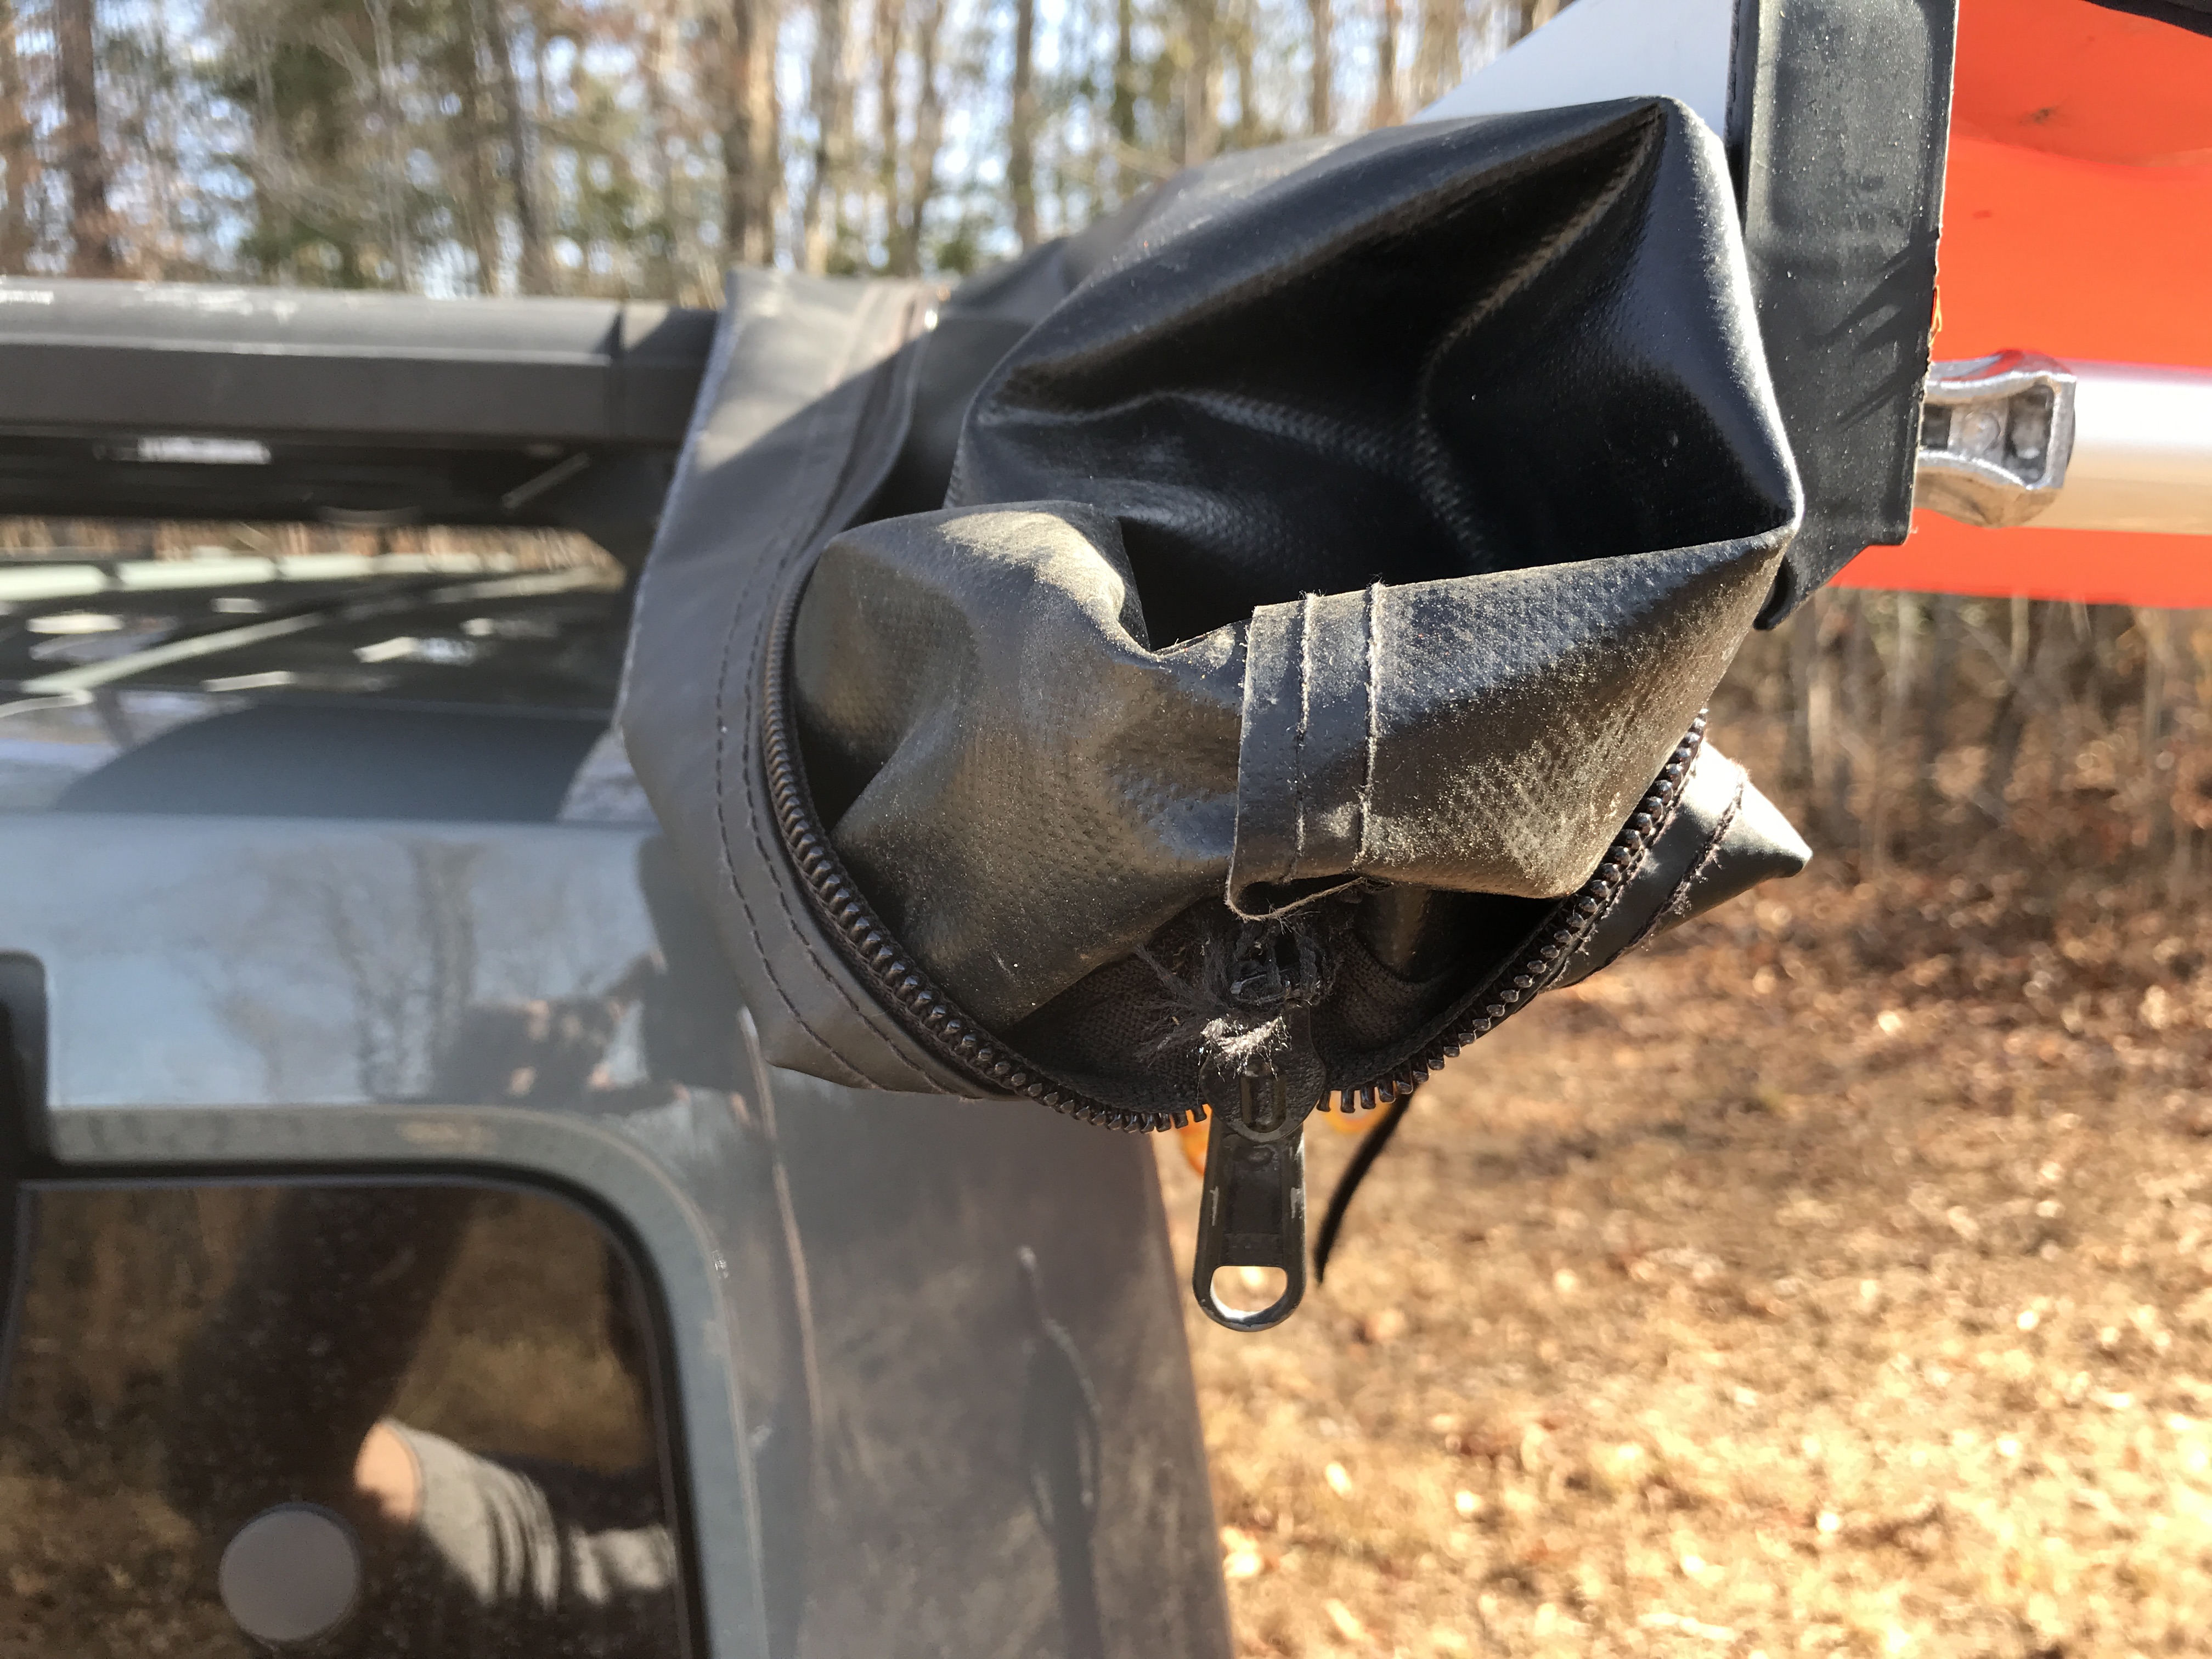
In a stroke of genius, Tepui didn’t carry the cover’s zippers around the corners. The cover is made just slight longer than necessary, allowing for a straight opening. This makes the cover much easier to close than the Smittybilt and ARB models. Zippers on those have to make turns and require substantial force to do so. It should also be noted that Tepui includes much more mounting hardware than Smittybilt or ARB.
Tepui definitely offers some superior features and should certainly be included when you’re shopping for an awning. You can find them at tepuitents.com and on Instagram @tepuitents.
For more from Neil, check out his trailer build over on Expedition Portal.
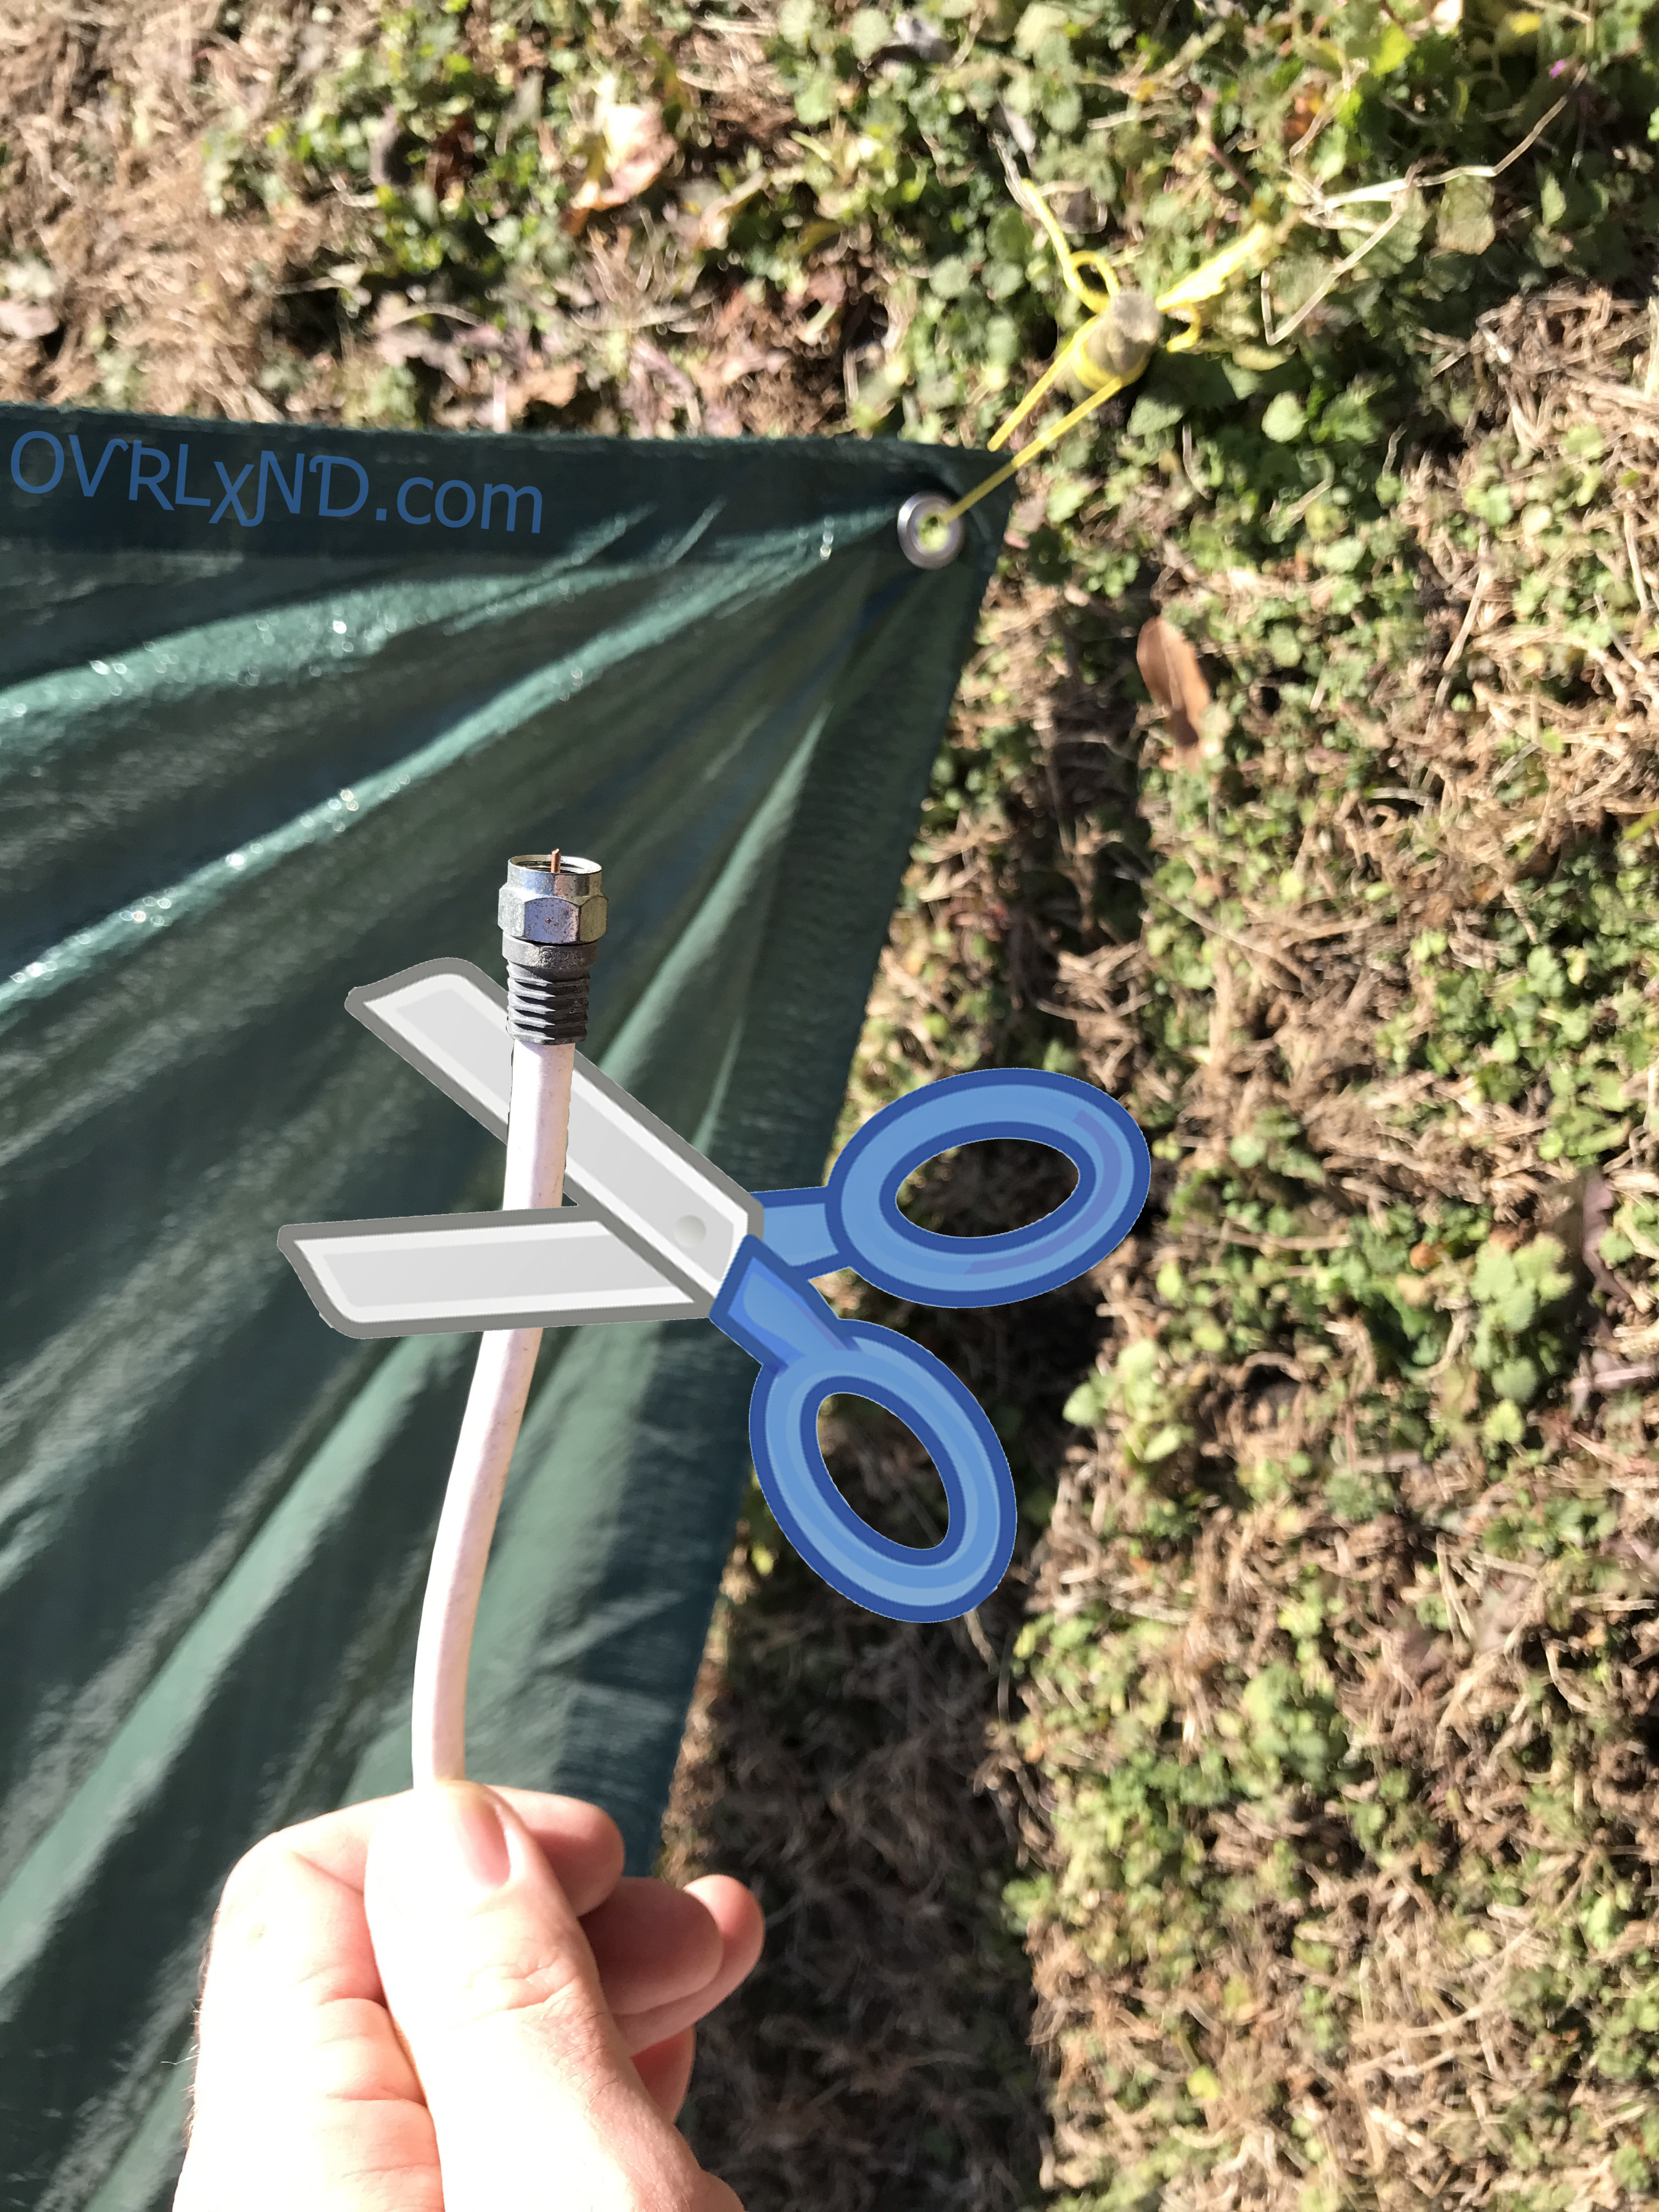
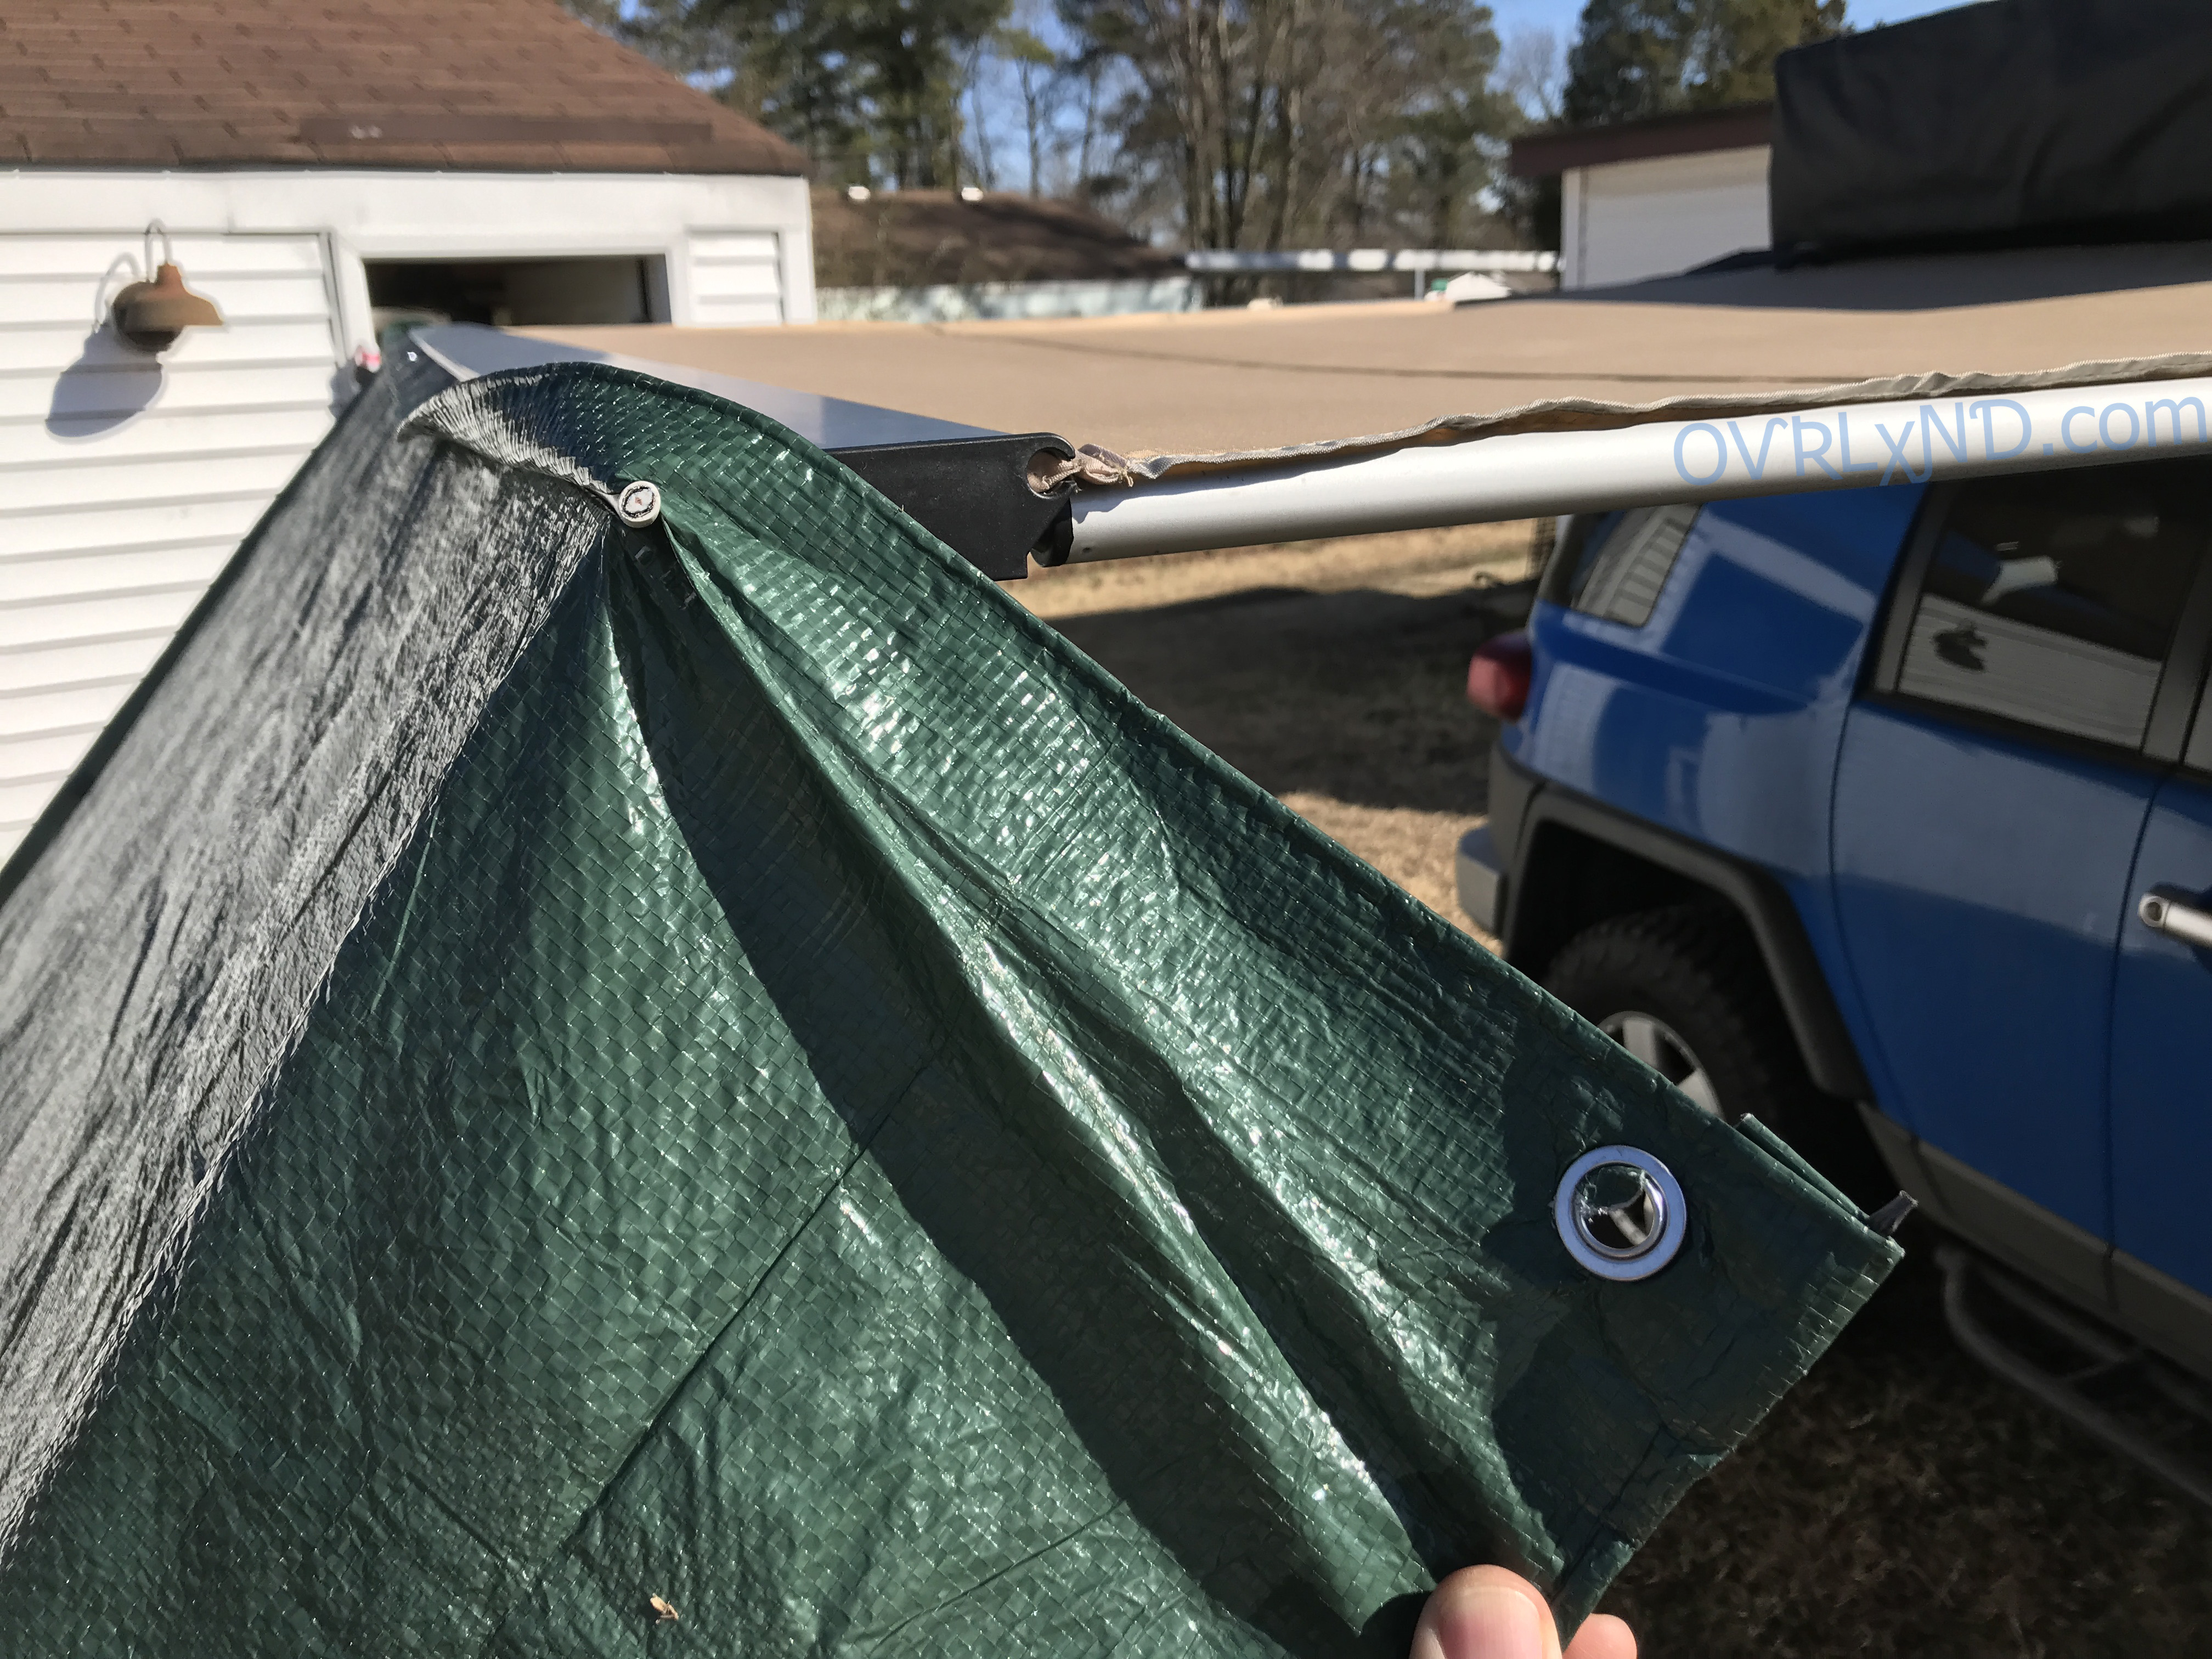
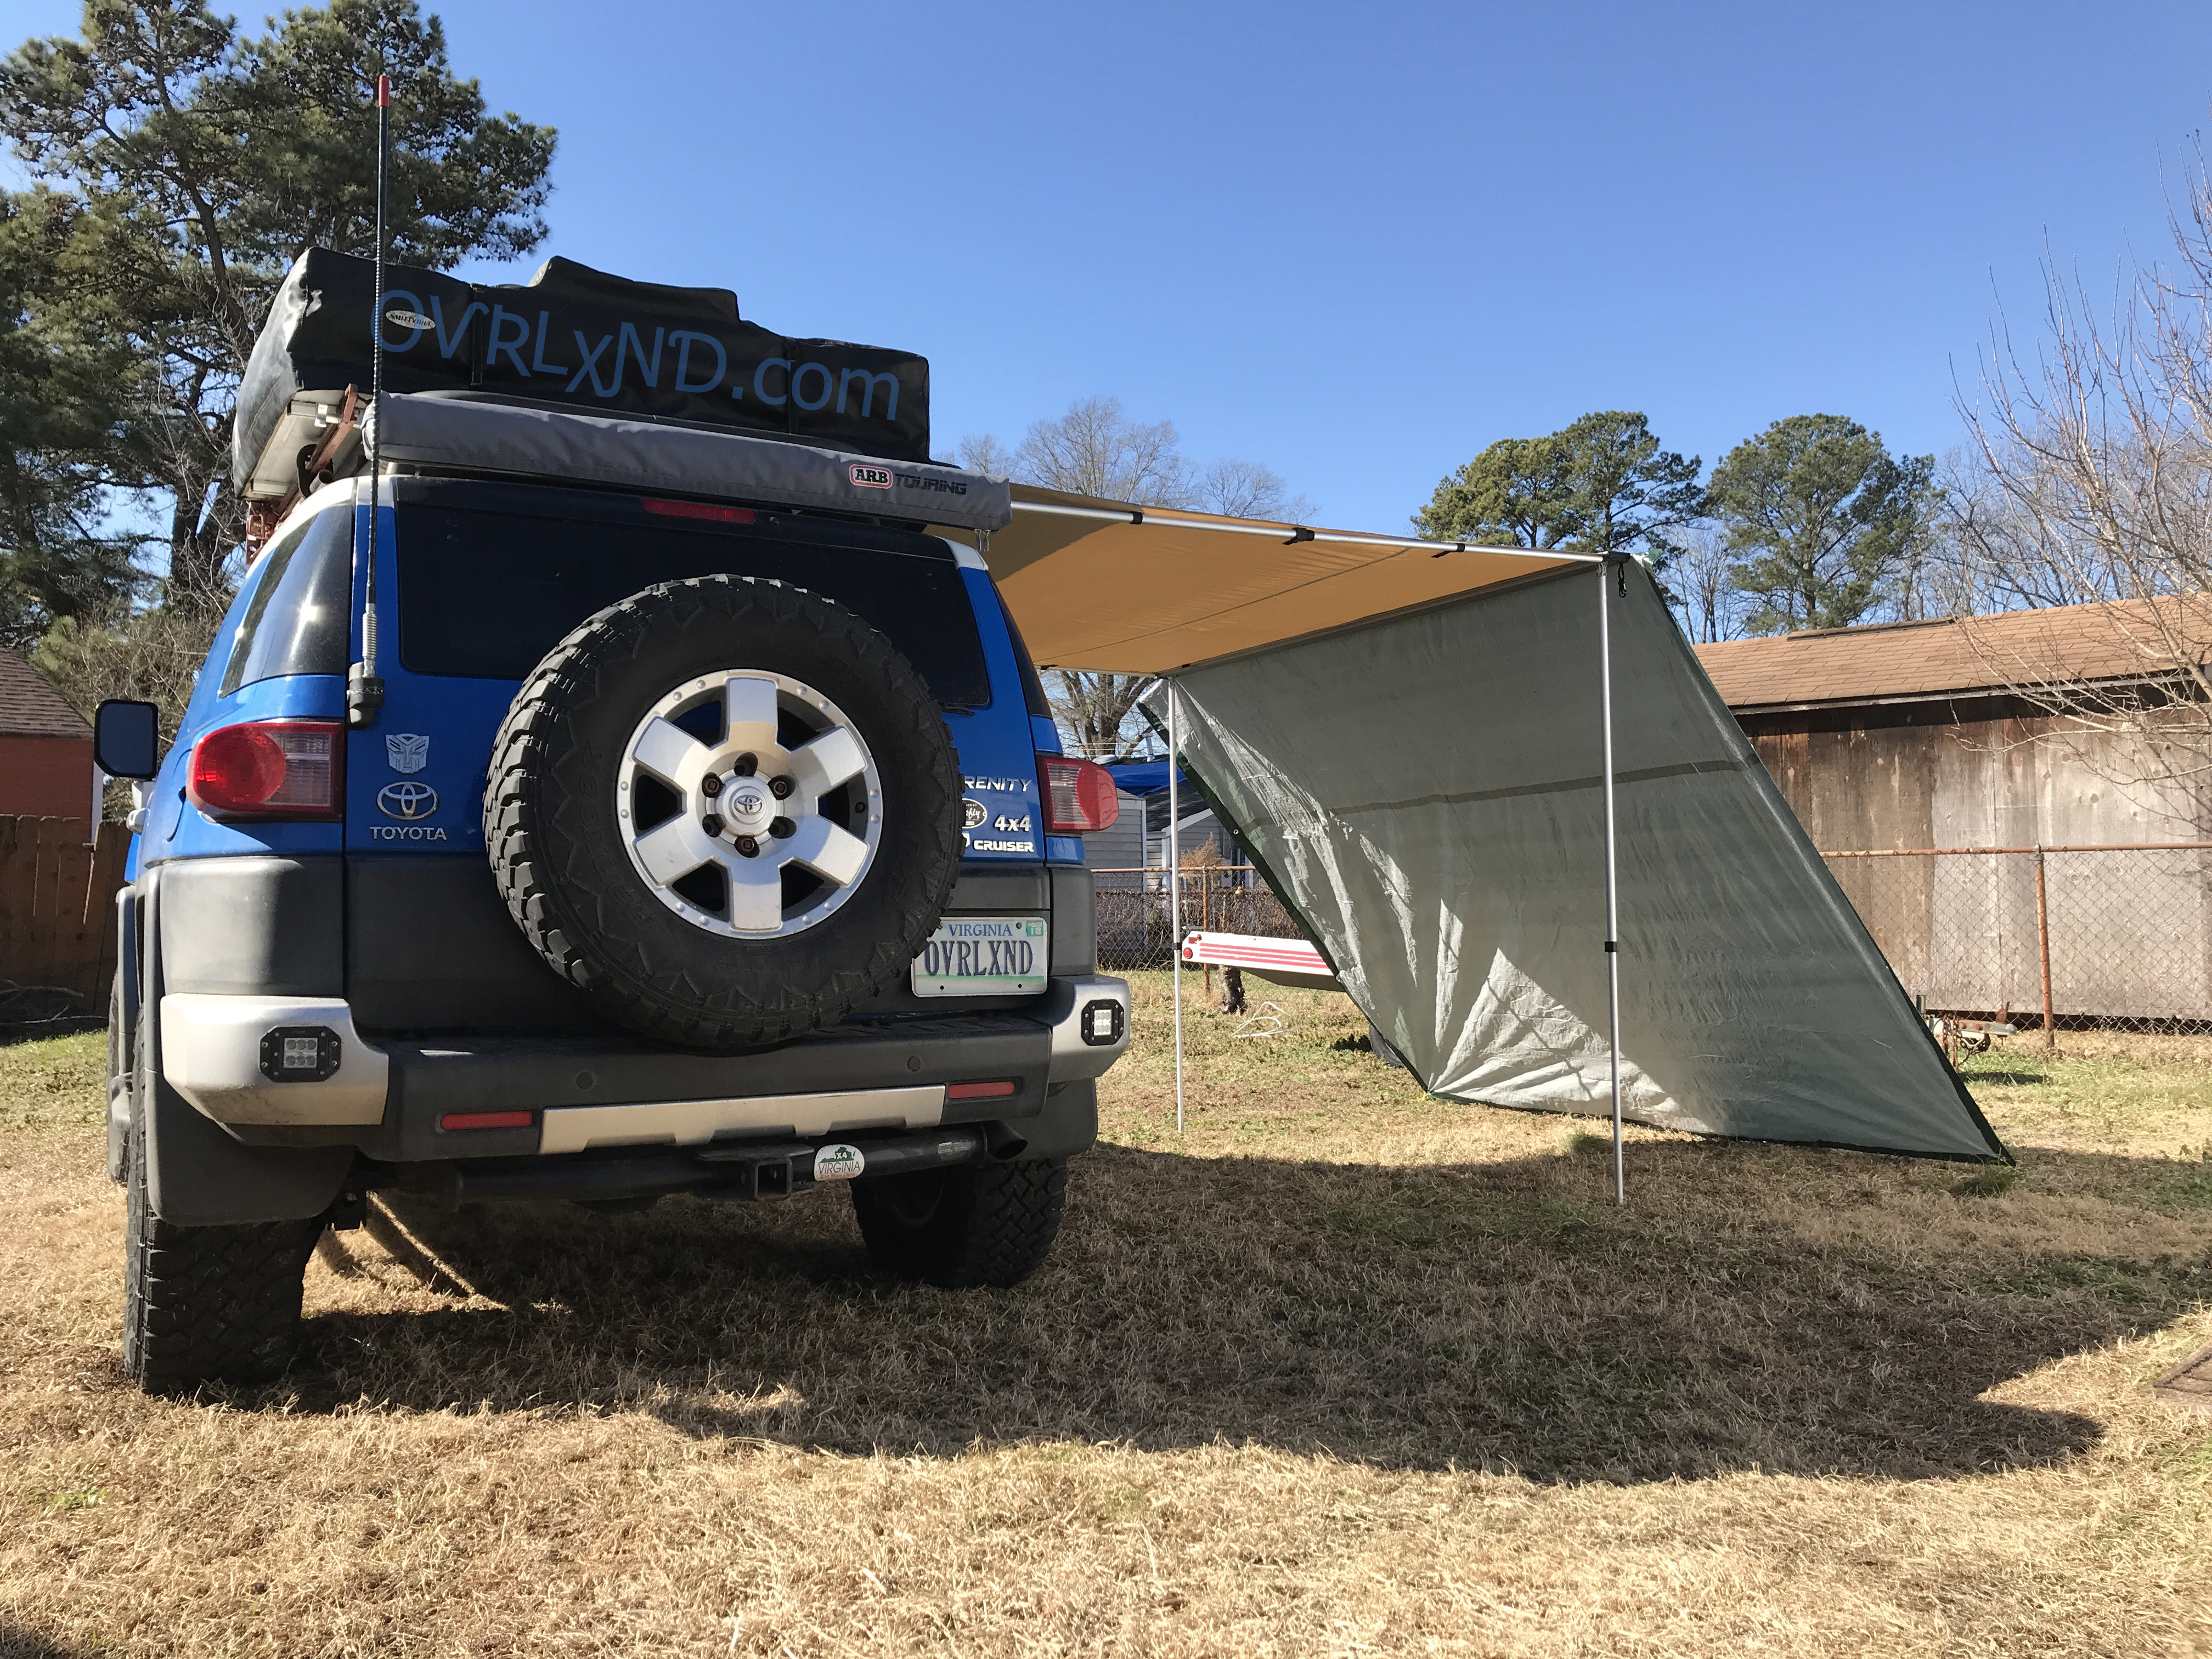
DIY Awning Extension
Because of the quality of components used, I hate to admit it, but one night last week I woke up at 3 am and this was the first thing that popped into my head.
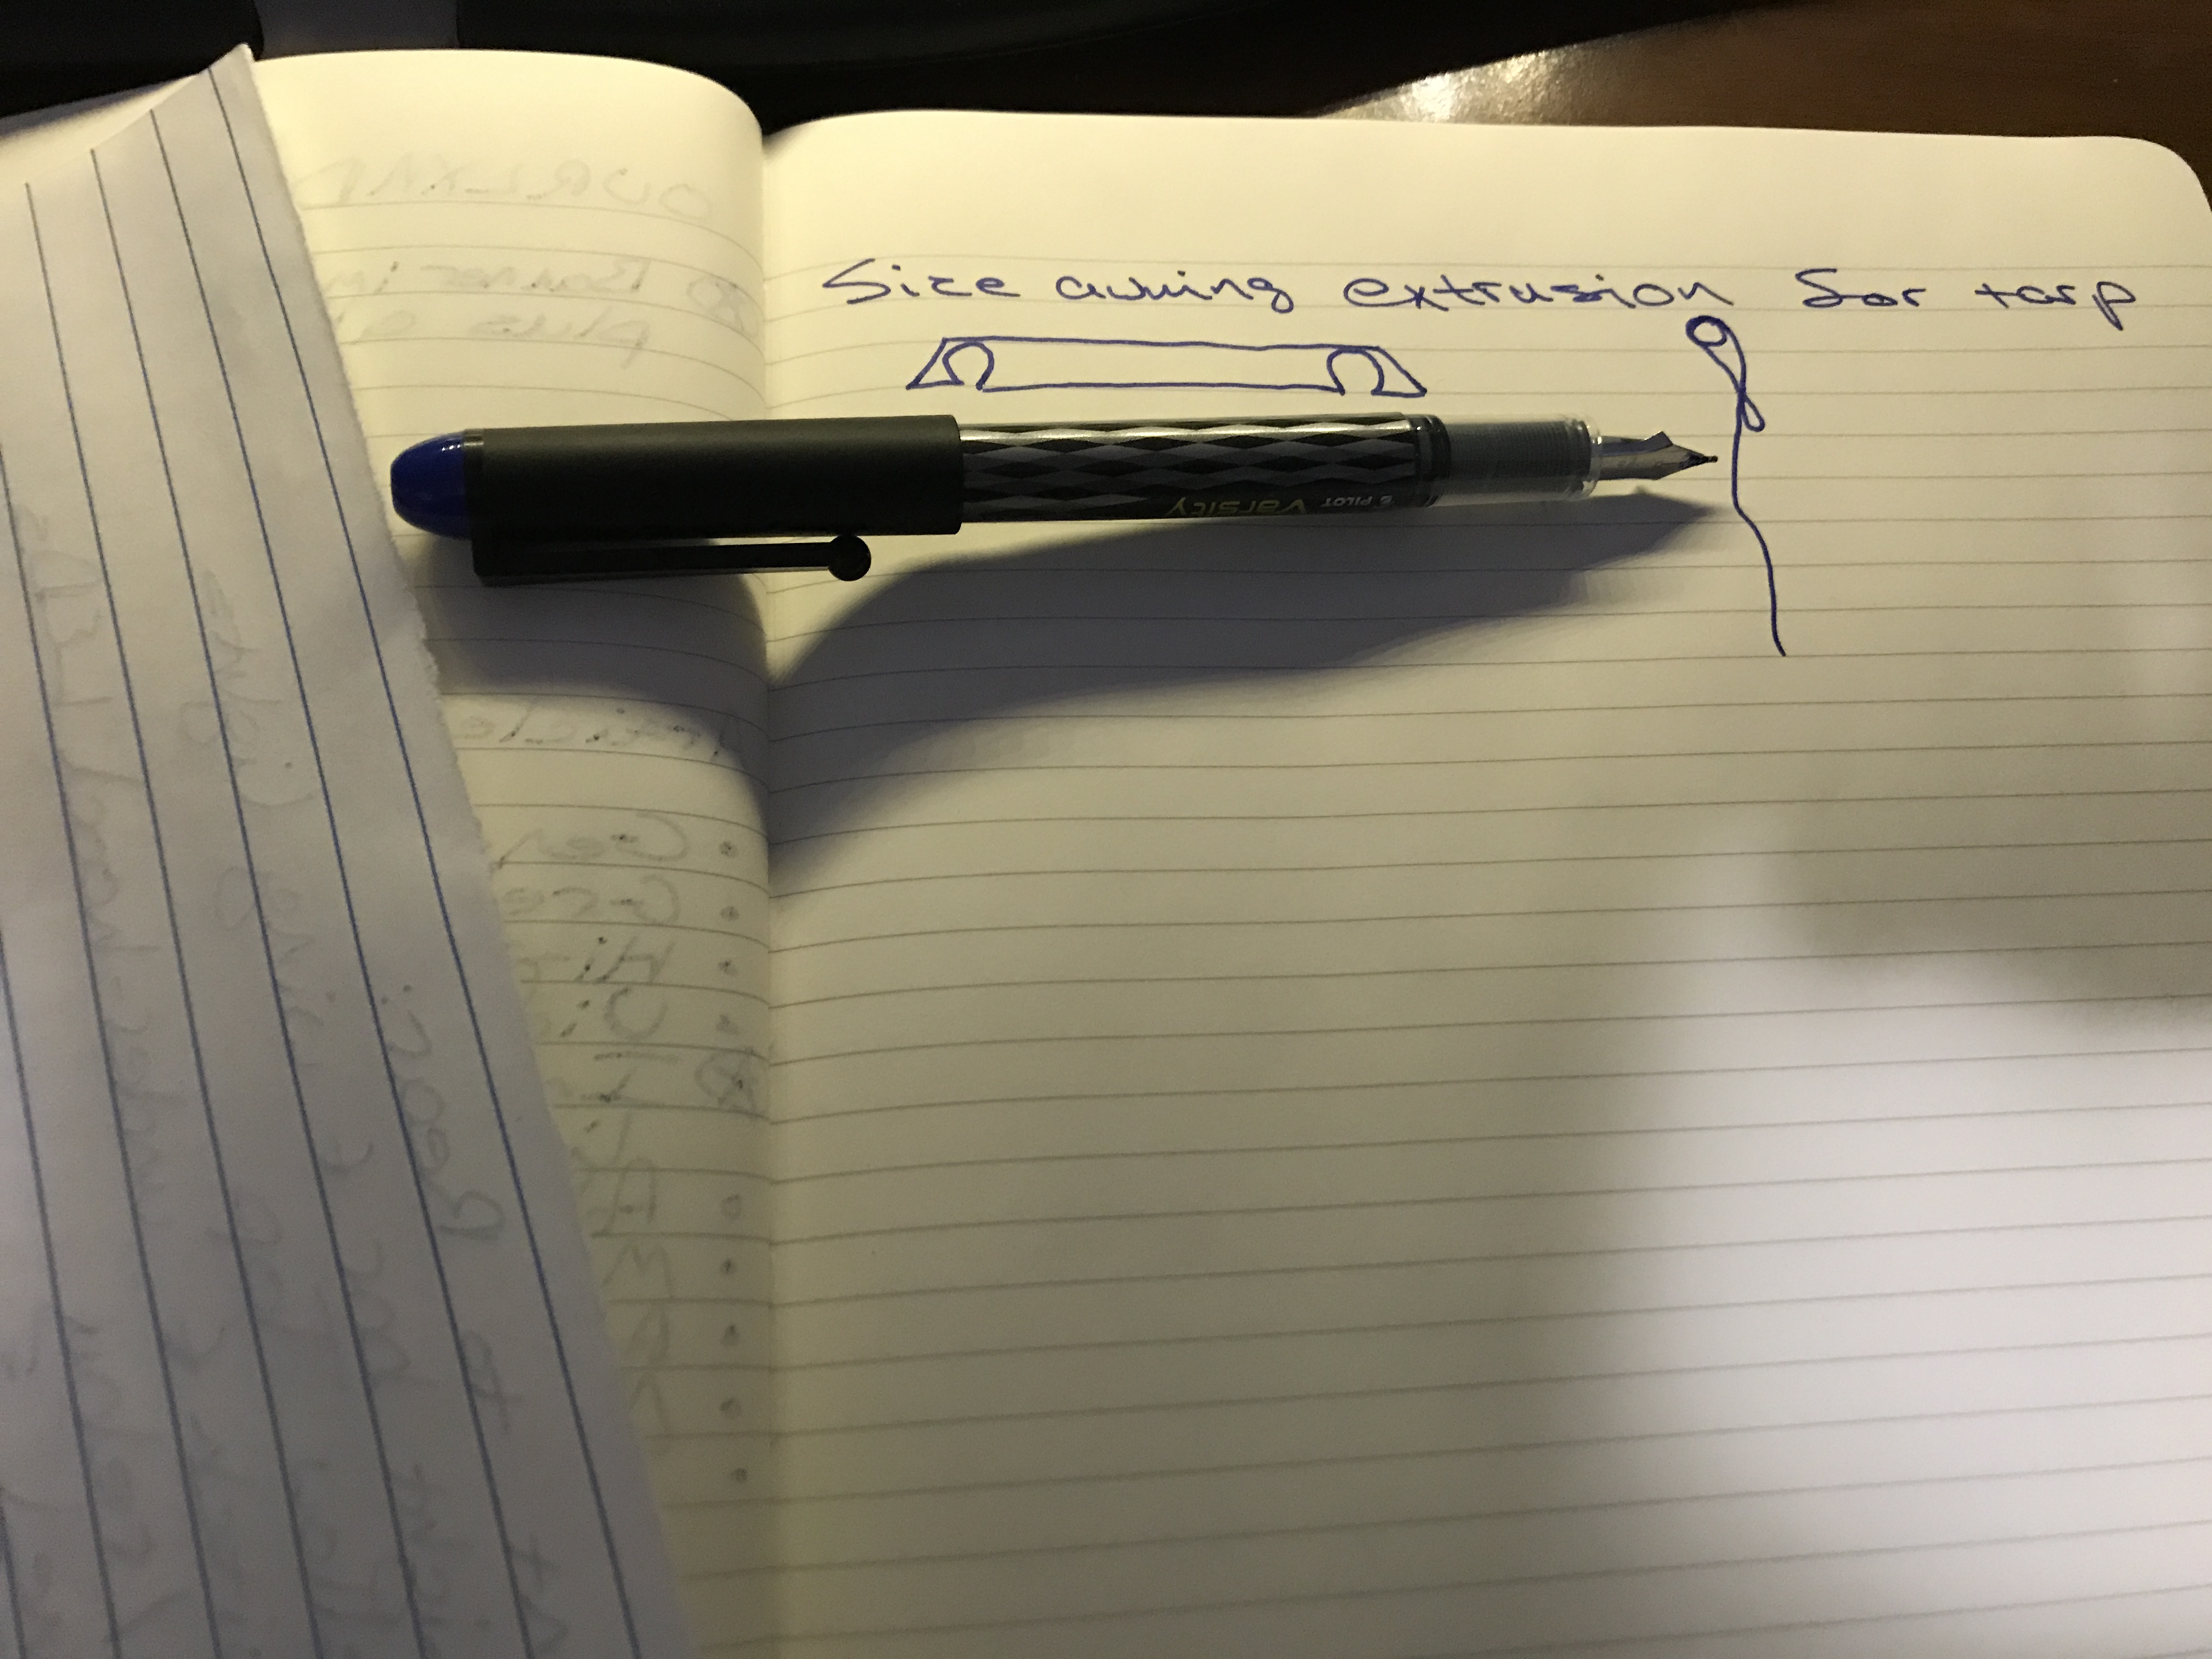
I guess that’s how inventions come to you, like standing on your toilet to hang a clock, then falling and hitting your head on the sink.

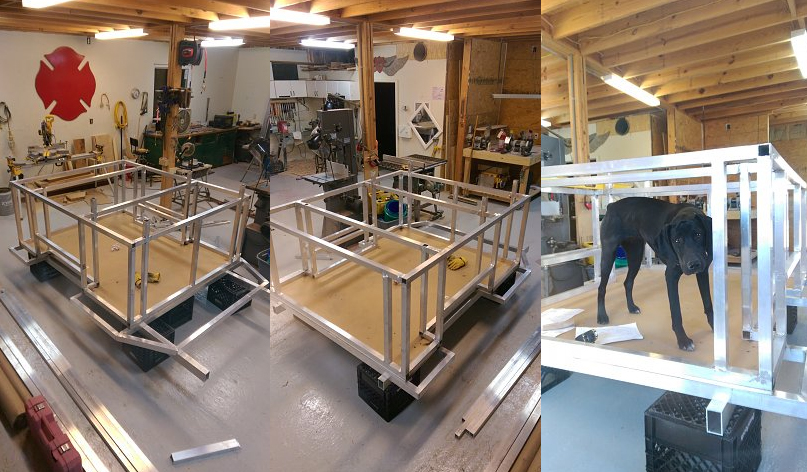
The only thing I hadn’t worked out yet was what to use as the “beading” that would keep the material in the track. I poked around in my dad’s garage first, simply because he has 40 years’ worth of WTF collected there, compared to my garage, which only has 8 years’ worth.

Leaving his house, I decided to pick up some 1/4″ pex. You’ve most likely seen it before as the clear plastic water line behind your refrigerator that feeds your ice maker. I still think that would have worked, but I forgot to stop at the store on the way home. Walking into my garage, I remembered I still have hundreds of feet of coaxial cable from our old apartment.
For the extension itself, I used a thin tarp I carry whenever we’re out on the trail. It could be used to lay in the mud under a rig, strung between trees for shelter, or whatever. It was cheap though, so it’s one you wouldn’t worry about damaging or discarding, making it perfect for just such an experiment.
This morning, I set about putting things together. I don’t know that I’ll ever use it, but it came out just like I’d pictured it. Proof of concept achieved. I call it a success.

Comparing Awnings from Smittybilt and ARB
A reader wrote in today to ask about our experiences with our Smittybilt awning.
“I found your website through expedition portal researching the Smittybilt tent and awning. The tent seems to be well received by most who purchase it, but what about the awning? Hows the structure and material? Have you compared it to other brands?”
Well, he’s right about the rooftop tent. Our Smittybilt 2783 has certainly served us well and we’re always looking forward to spending another night in it.
Our side awning is a Smittybilt 2784, which has been an invaluable piece of kit. We have enjoyed many days and nights under it, sheltering us from the the sun and rain, covering our cooking from falling leaves or snow, or just giving us a shady place to read or relax in a hammock.
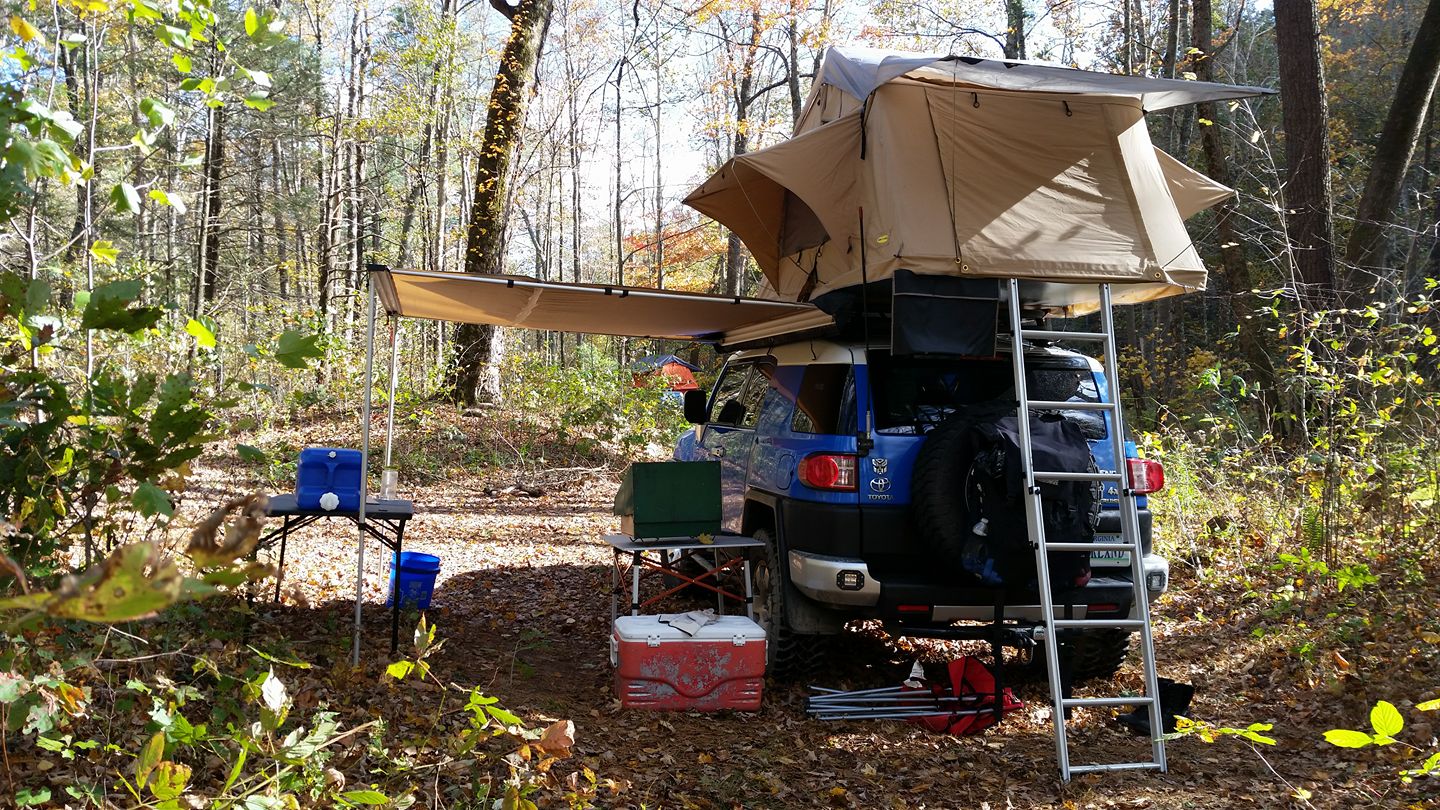
The Smittybilt is the larger of our two awnings, at roughly 8’6″ wide and 6’6″ long. Originally placed on the driver side, we found that the awning provided significantly more shade on the passenger side when were backed up to the shore, as is the norm in the Outer Banks. The following photos were taken about a year apart, but at roughly the same time of year and same time of day. The longer shadow clearly speaks for itself.
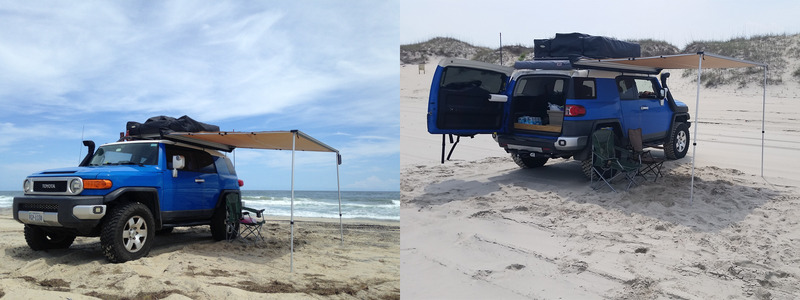
As we’ve mentioned before, prior to the FJ, we had a Jeep Cherokee. One of the only things we’ve missed from the XJ was the rear hatch. In seconds it provided both protection from the elements and access to the rear cargo area from any angle.
The FJ, instead, has a rear door. That certainly has its own benefits, but immediate shelter isn’t one of them. We decided to add a smaller awning to rear to take the place of the absent hatch. Smittybilt didn’t offer an awning in this size, so we went with an ARB 814301. It is approximately 4’6″ x 6’6″, so it certainly provides more cover than a rear hatch would, although it takes slightly longer to deploy.
Last fall, when cleaning the covers and treating the fabric, we took the time to snap a few photos and record some differences between the two awnings. So what did we find?
The first thing we noted was the material the joints are made of. The ARB uses plastic, while the Smittybilt is metal. So far there has been no difference in durability, but I’d certainly trust the metal to be stronger, especially in cold temperatures.
Also of note is the seams on the covers. After washing and rinsing both awnings, the ARB was quite wet where water had penetrated the stitching. We noticed daylight was visible through some of the needle holes. The Smittybilt cover is taped on the inside over the seams. This appears to substantially prevent water intrusion. The amount of water pressure present from a spray nozzle is much higher than nature itself is likely to provide, and the ARB has never been damp when we’ve opened it. If one was concerned, it could be better sealed easily with some Seam Grip or other sealer.
The next point is of minor consequence, but the engineering is a bit confusing. On the Smittybilt, the pins at the end of the poles, both horizontal and vertical, are about 3 times as long as those on the ARB. The outer channel on the Smittybilt is drilled all the way through to provide two holes for the pins to rest in, plus a third for a length of cord that allows you to stake the awning down. The ARB is only drilled through two of the 3 channel fins, but the pole pins are only long enough to make it through the first hole. The application of rotational pressure to the horizontal pins would be undesirable for any awning, but one would suspect that the single fin on the ARB would be more susceptible to damage at that point.
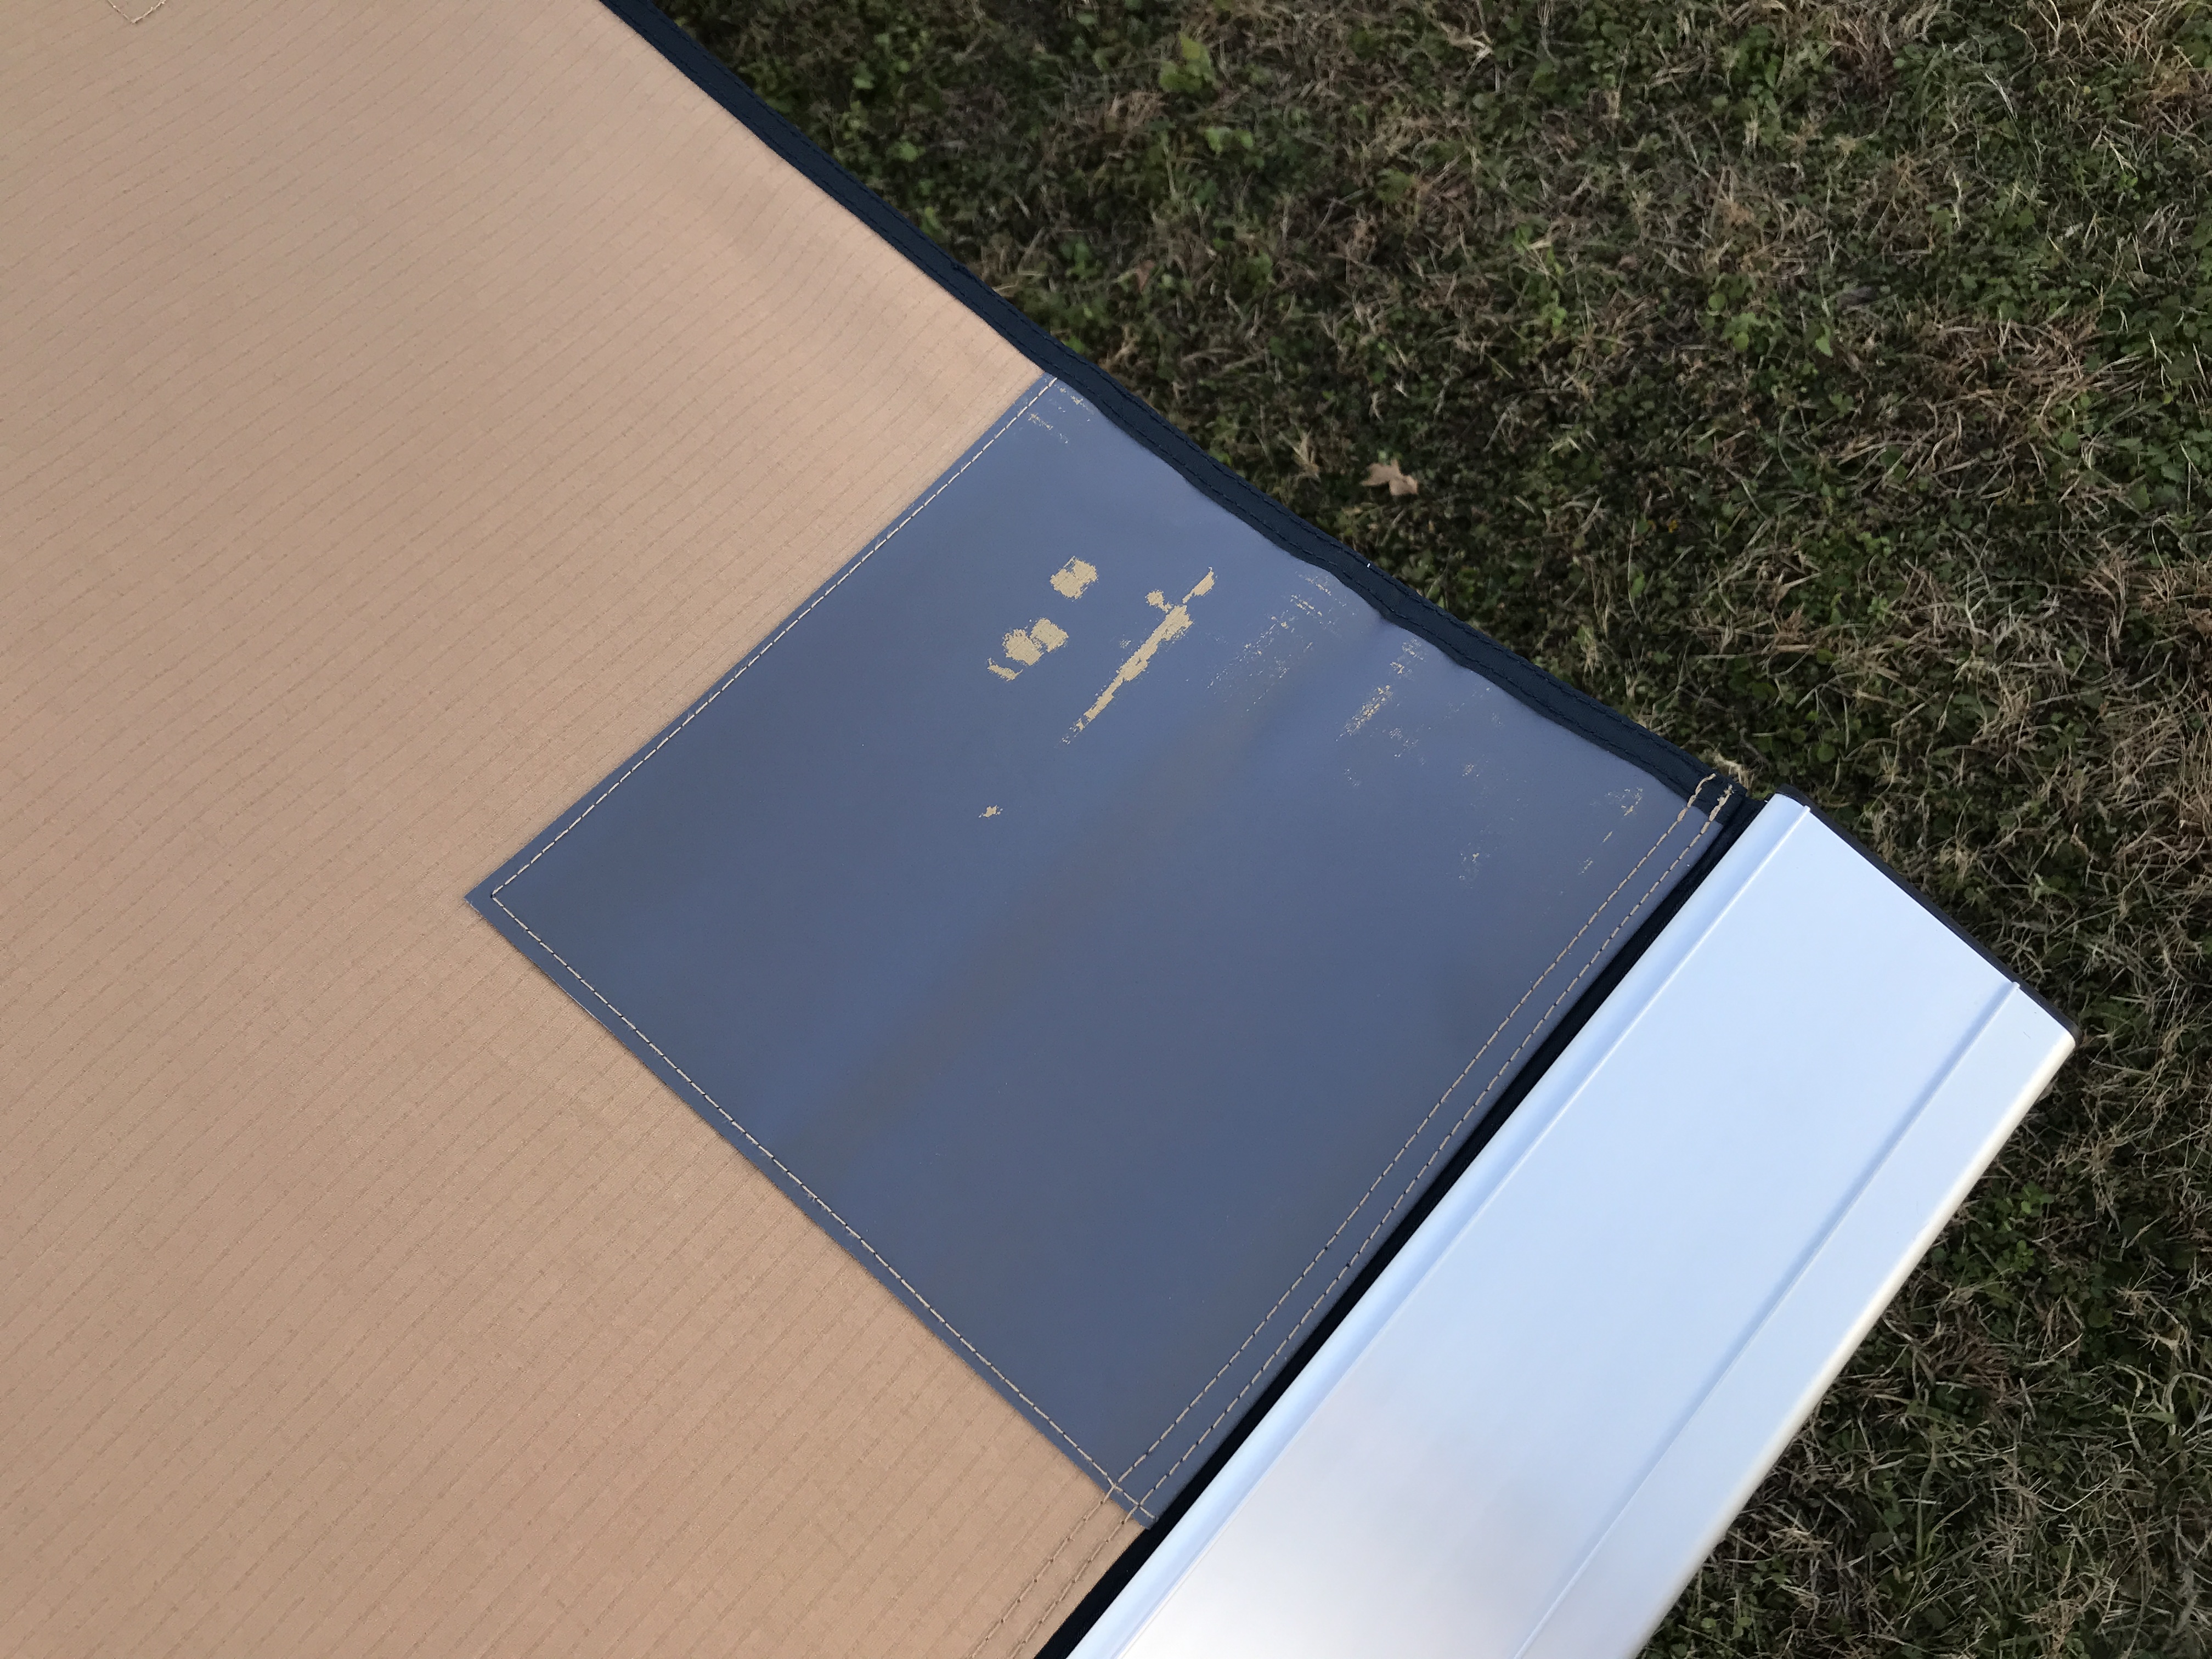
Another peculiarity of the ARB awning is what appears to be anti-abrasion pads at the front corners. These pads and the rest of the fabric seem to be dissimilar materials and it appears that some of the coating from the primary fabric has stuck to these pads. Does it matter? Probably not. Does it seem odd though? Certainly.
Lastly is a final point of value. However simplistic, the Smittybilt awning did come with some basic mounting hardware, including L-brackets, u-bolts, and examples of how to mount it to roof racks, baskets, etc. We purchased the Smittybilt awning prior to the rooftop tent and originally had it secured via clamp-style awning mounts. After adding the tent, we needed to locate the awning a bit lower to clear the tent base. The brackets included with the awning worked perfectly.
The ARB awning came with the nuts and bolts that are compatible with most mounts, but that was it. It was nice to again have a use for the excellent Fourtreks modular awning mounts we’d originally used on the larger awning.
Maintenance on both awnings has been minor. Twice a year we’ve scrubbed the covers clean with soap and water, then treated them with 303 Aerospace Protectant to minimize UV damage. The awning fabrics have always kept us perfectly dry, but we’ve still given them a quick once-over with Scotchguard Heavy Duty to help with water repellency.
The Smittybilt has gotten far more use because of its size, mounting location, and now starting its fourth year of being on our rig. We may look into a Foxwing in the future, but right now we’re quite content with what we’ve got. Despite the handful of negative points concerning the ARB, both awnings have been completely reliable, and you can expect an awning from either manufacturer will give you many years of trouble-free use.

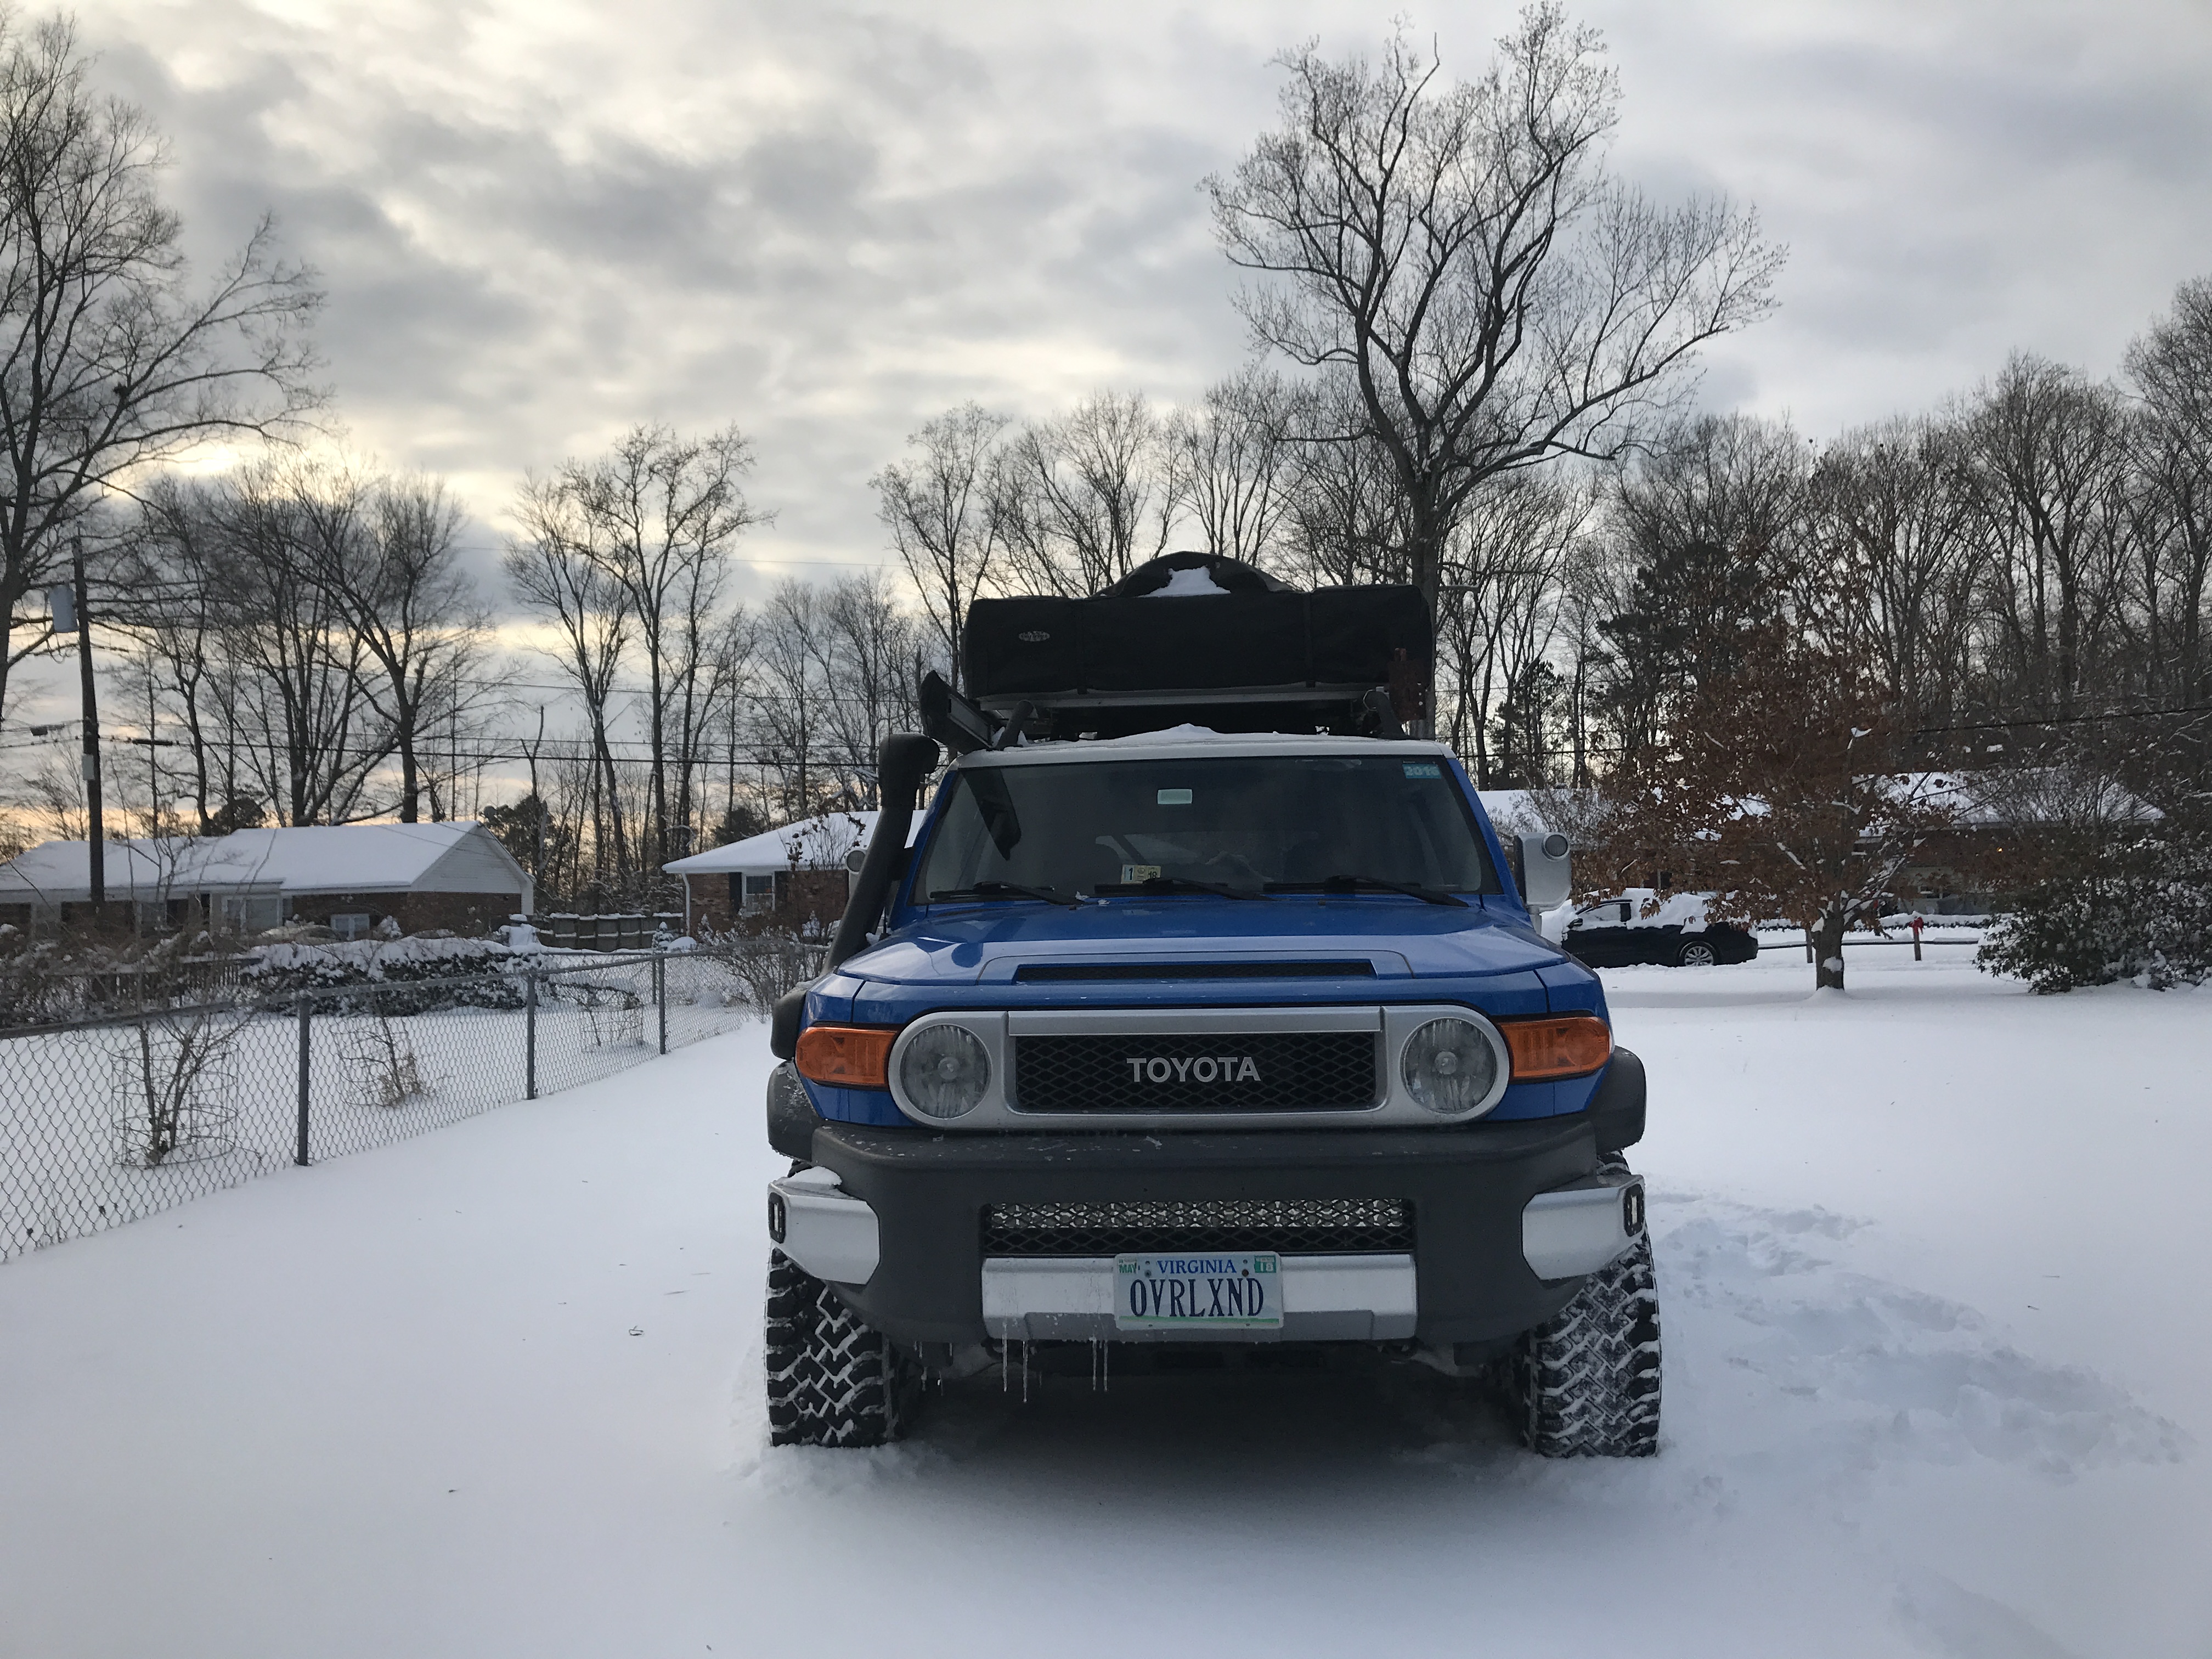
The Bombogenesis
It started snowing last Wednesday night. It’s Monday night now. We were never homebound, but the rest of town is finally starting to thaw. Back to work tomorrow. It was fun while it lasted!